

Your Vector Toolkit for Computational Design
A toolbox of vector methods

This article is part of the Designing with Numbers series, a continuation of the Geometry Basics series. Together, they explore how computational design is shaped first by geometry, then by numbers.
Part 1 : It’s not always about geometry, numbers matter too.
Part 2 : How Curve Parameters Give You More Control in Grasshopper
Part 3 : How Surface Parameters Turn Geometry Into Information
Part 4 : Your Vector Toolkit for Computational Design (This article)
Part 5 : Using Logic to Guide Your Models in Computational Design
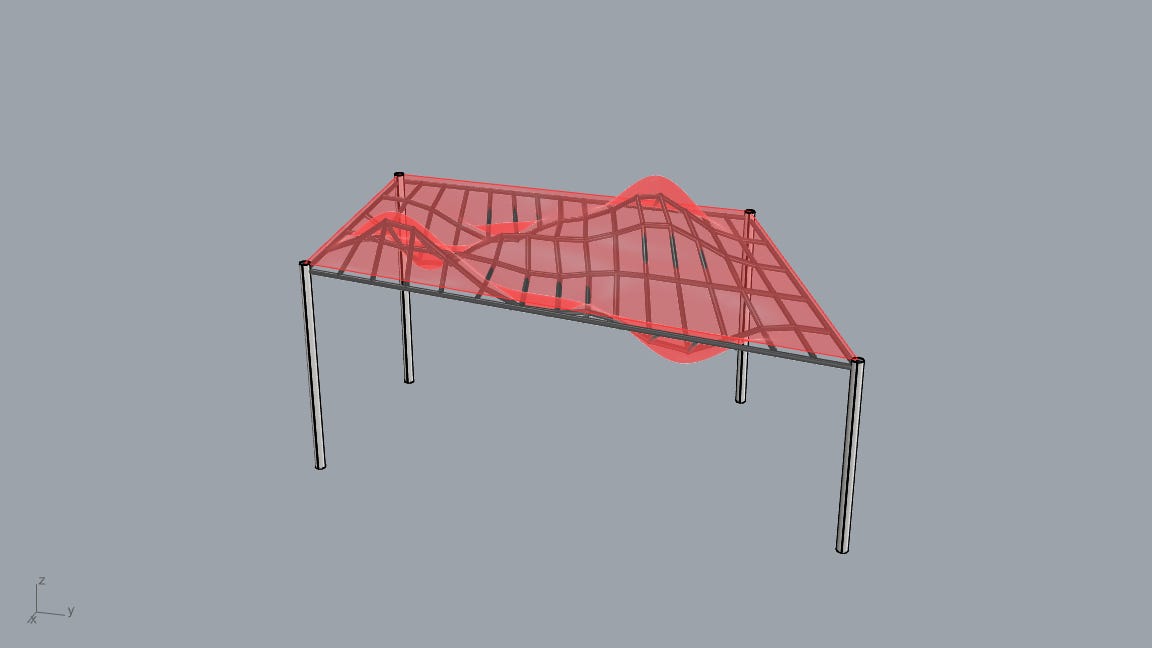
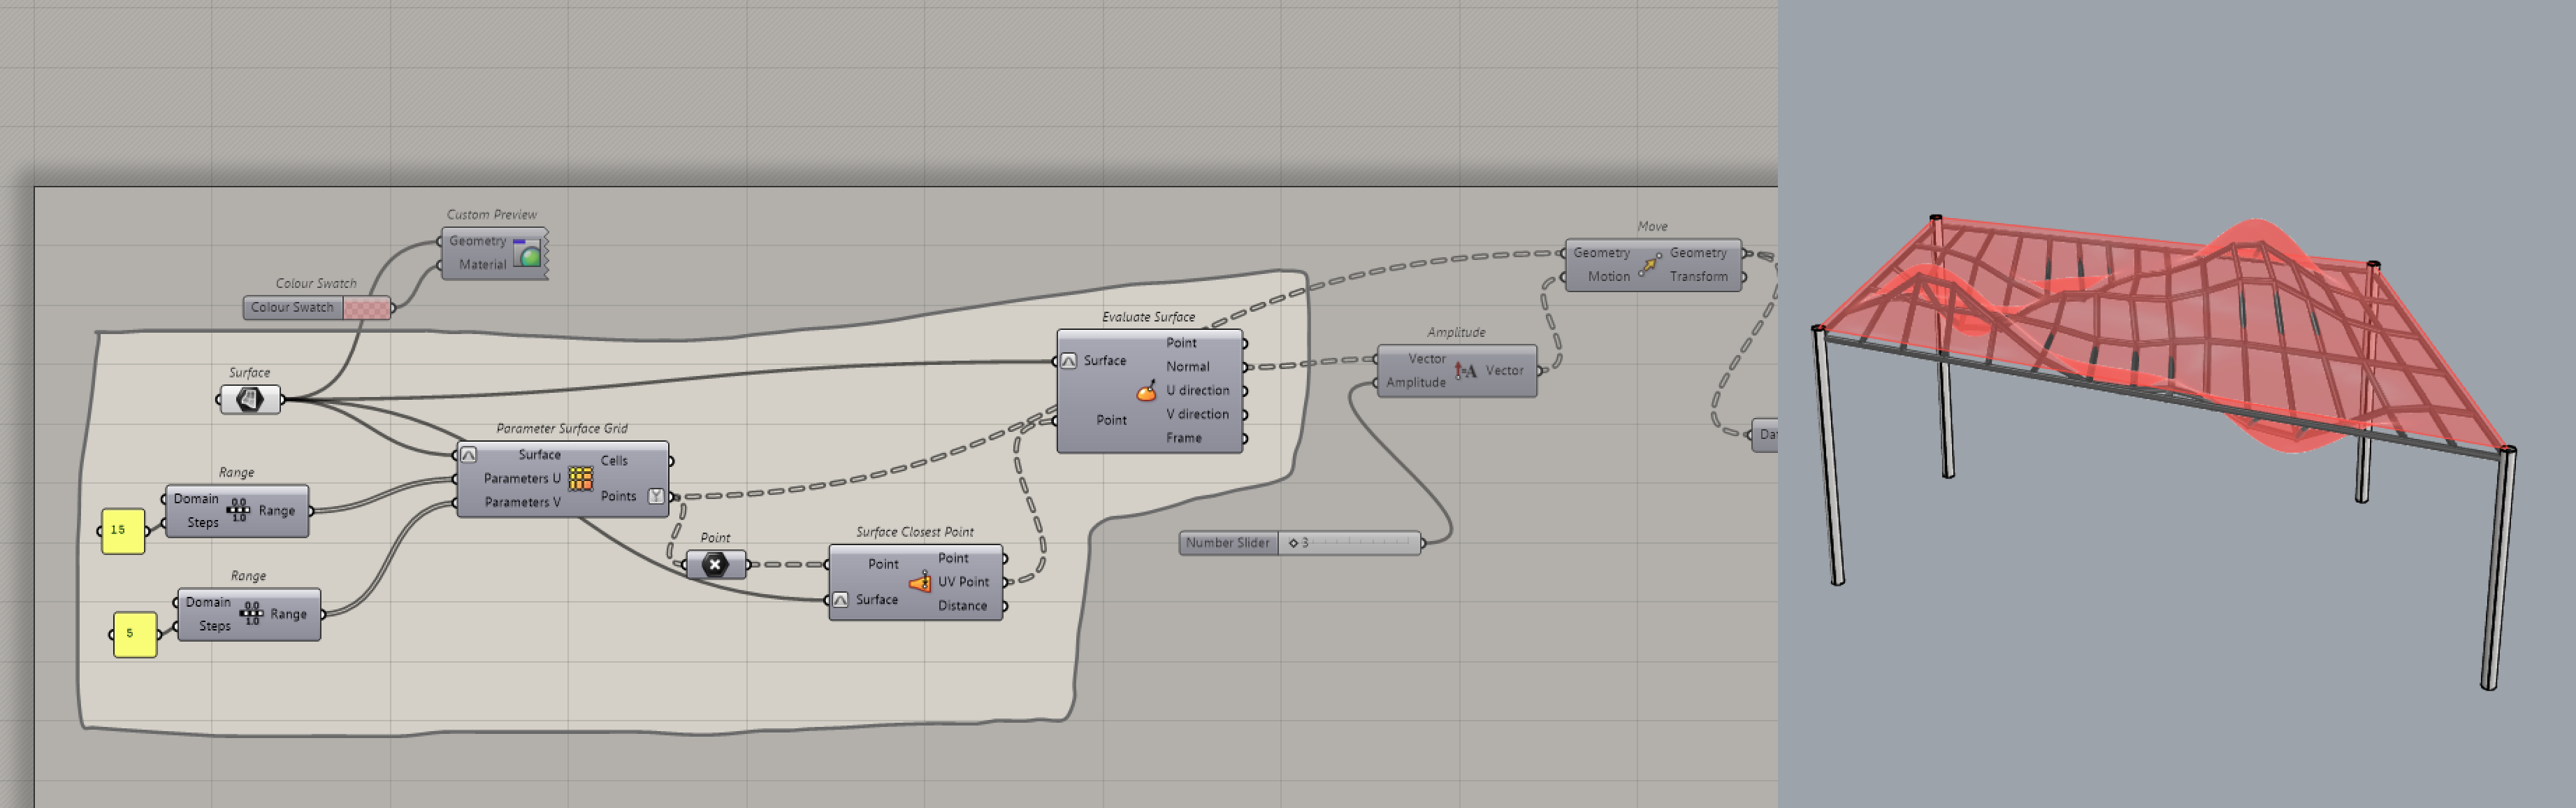
A client once gave me this wavy roof that they wanted to build. My job was to model up some framing members, so that everyone could see what it would look like in real life. But the geometry was hard to work with.
Maybe because I just graduated. And maybe it’s because I hardly knew what I was doing in Grasshopper.
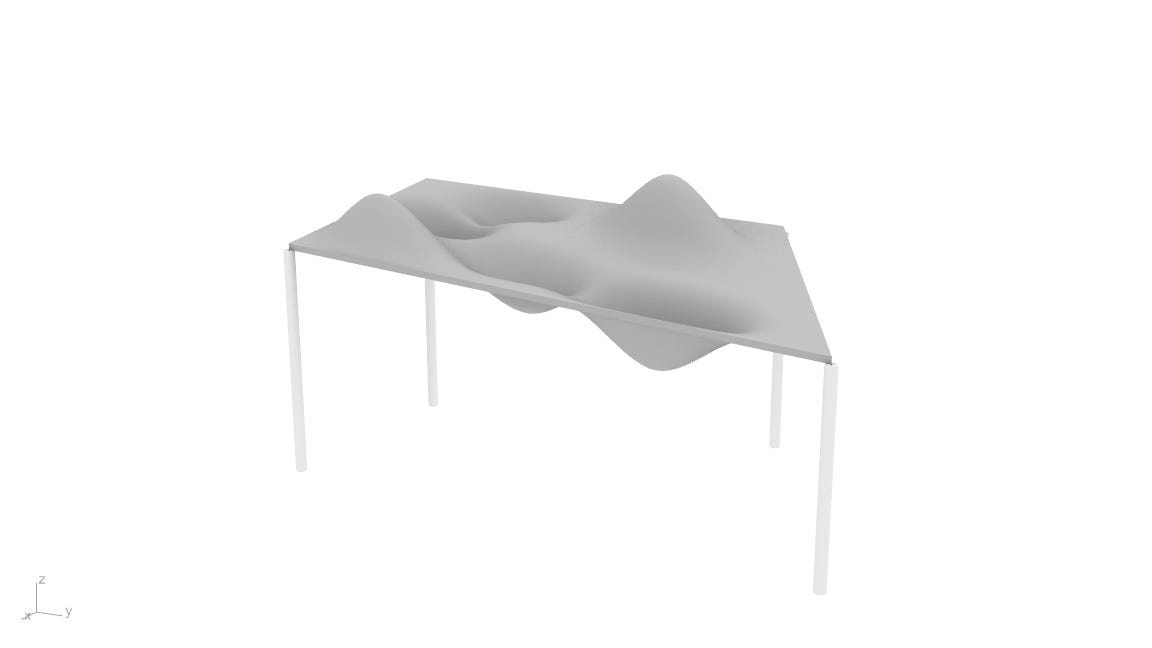
I spent hours trying to create the framing. I tried fitting lines to it, I tried offsetting, I tried using a grid. But they all had their own problems, I just couldn’t get the the framing to work.
My manager, assuming he knew I was struggling, came to check on me. His advice was to try and use the normal vectors of the surface.
I had no idea what a normal was.
But a quick Google search told me that it was a property of a surface. And that it’s a vector that points “outwards” of a surface for a given point.
I then went through some Grasshopper YouTube videos, which gave me some components to work with. Namely the evaluate surface component.
And that blew my mind. Because here I was, I had been trying every method under the sun, when the elegant solution was right there. The normals. Instead of fitting lines, then get the intersections between the surface, then use the points to create planes, then ...... I can just use the normals.
It took me a couple more hours but I eventually understood it and managed to make the framing.
When it comes to geometry, vectors used to be the last thing on my mind. It also took me awhile to understand them, because using them requires some understanding of math in the 3D space which is not something I normally do.
And, I know what you're thinking but you don't have to be a math genius to use vectors. A little understanding of vectors in computational design goes a long way. It unlocks a whole world of techniques that make modeling easier, faster, and cleaner.
But I am not about to teach you what vectors are like we are in some high school class. Instead, let me share some of the practical ways I use vectors in my own modeling.
Note: If you did want to learn more about vectors, check out Hopific’s vector article or my own article about it in the last series.
The Vector Toolkit
Cloning things
Vectors are useful for copying/moving things around. You can use components like move or Linear Array to create copies of geometries easily. Linear Array is especially useful for creating series of repeated elements.

I use this a lot when creating holes in models.
Extruding
Another common way to use vectors is to extrude things. It's an operation that you might have done a few times now but it's still worth noting.
What I actually find useful with the extrude component using it for intersections or cutting. I typically use it to generate cutting shapes.
Note: Any intersections can get slow though depending on the number and quality of your geometry, so just be careful
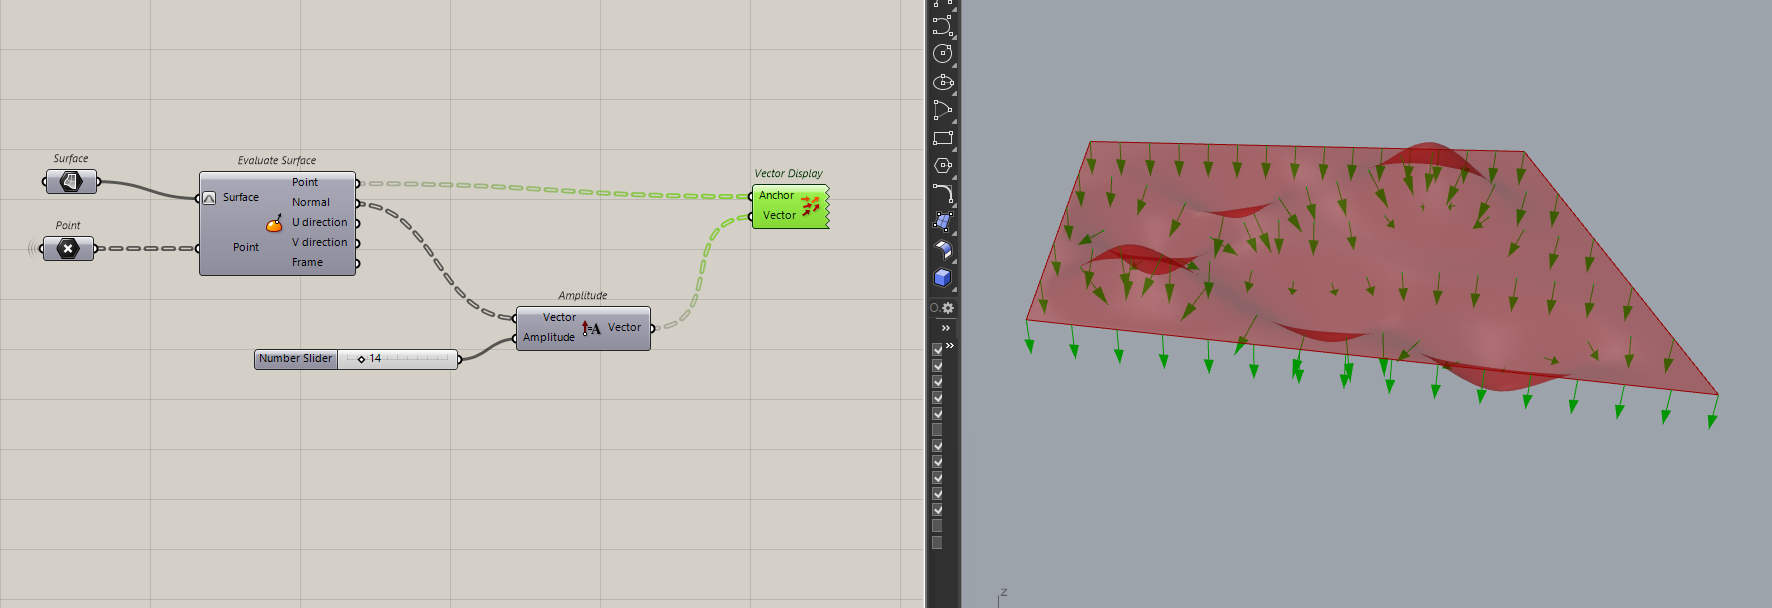
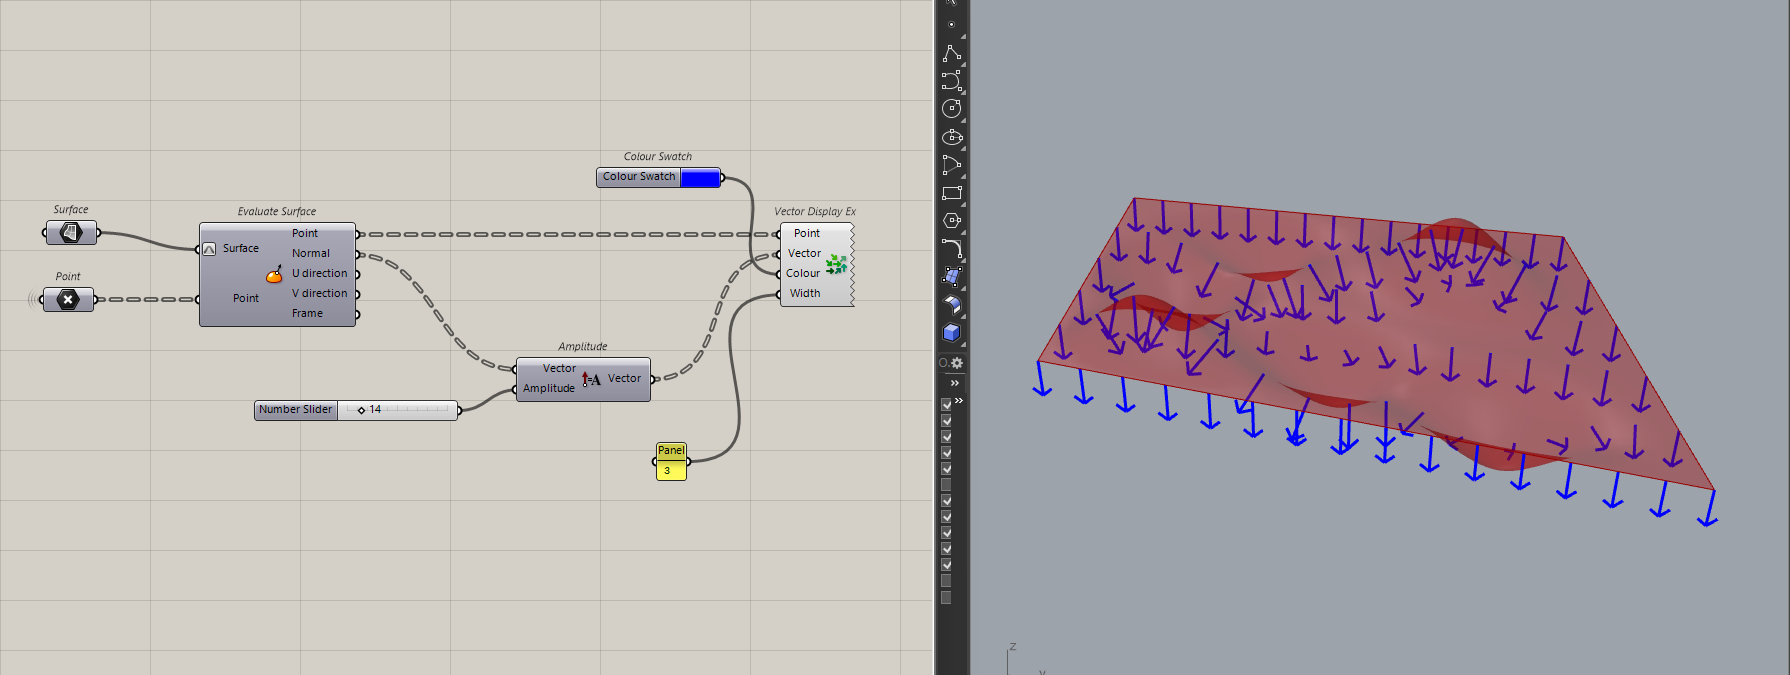
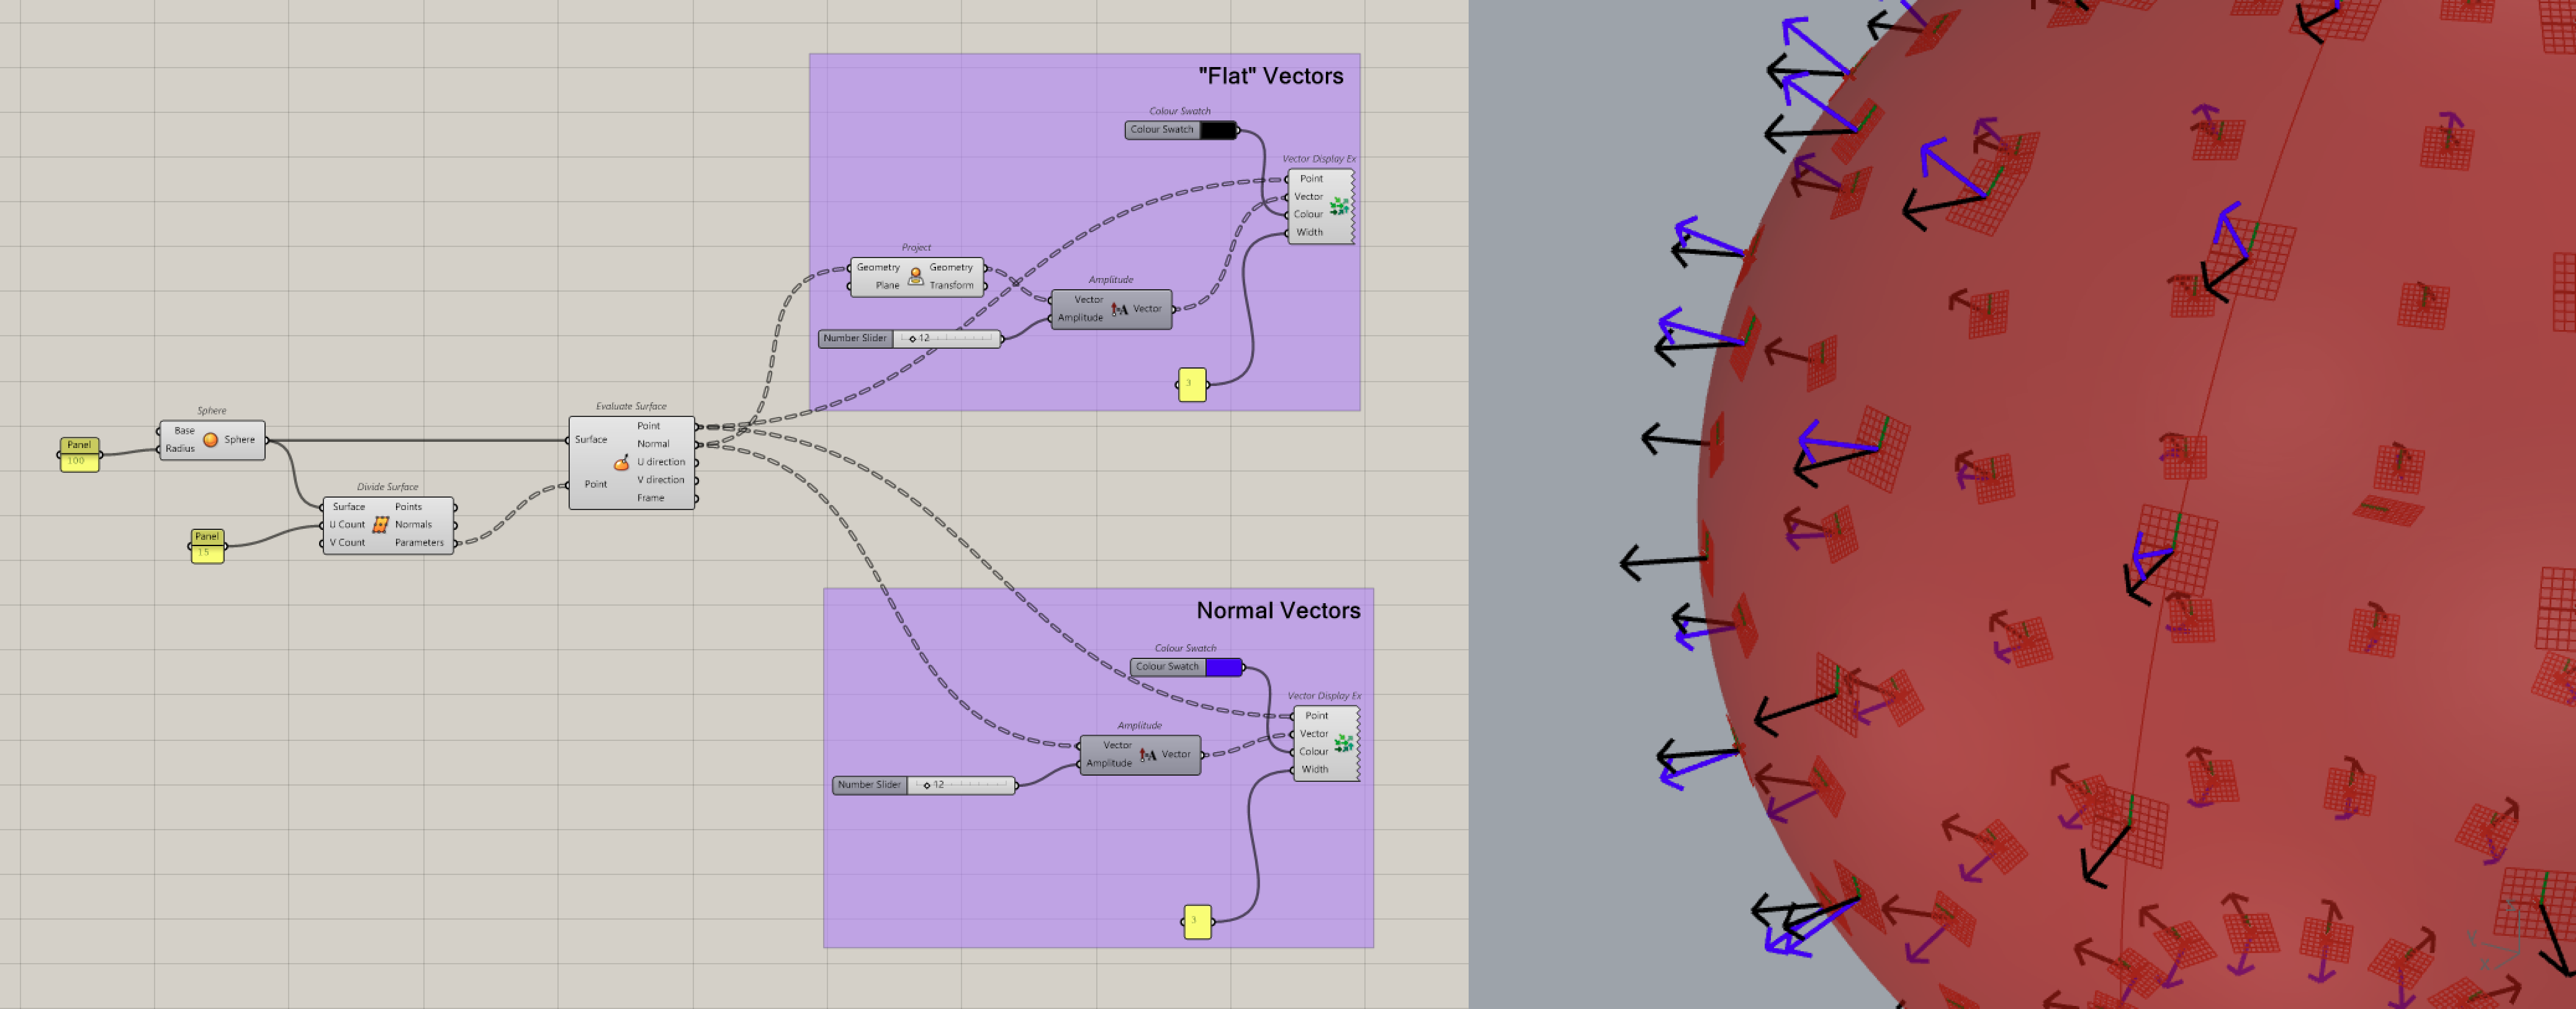
Visualizing Vectors
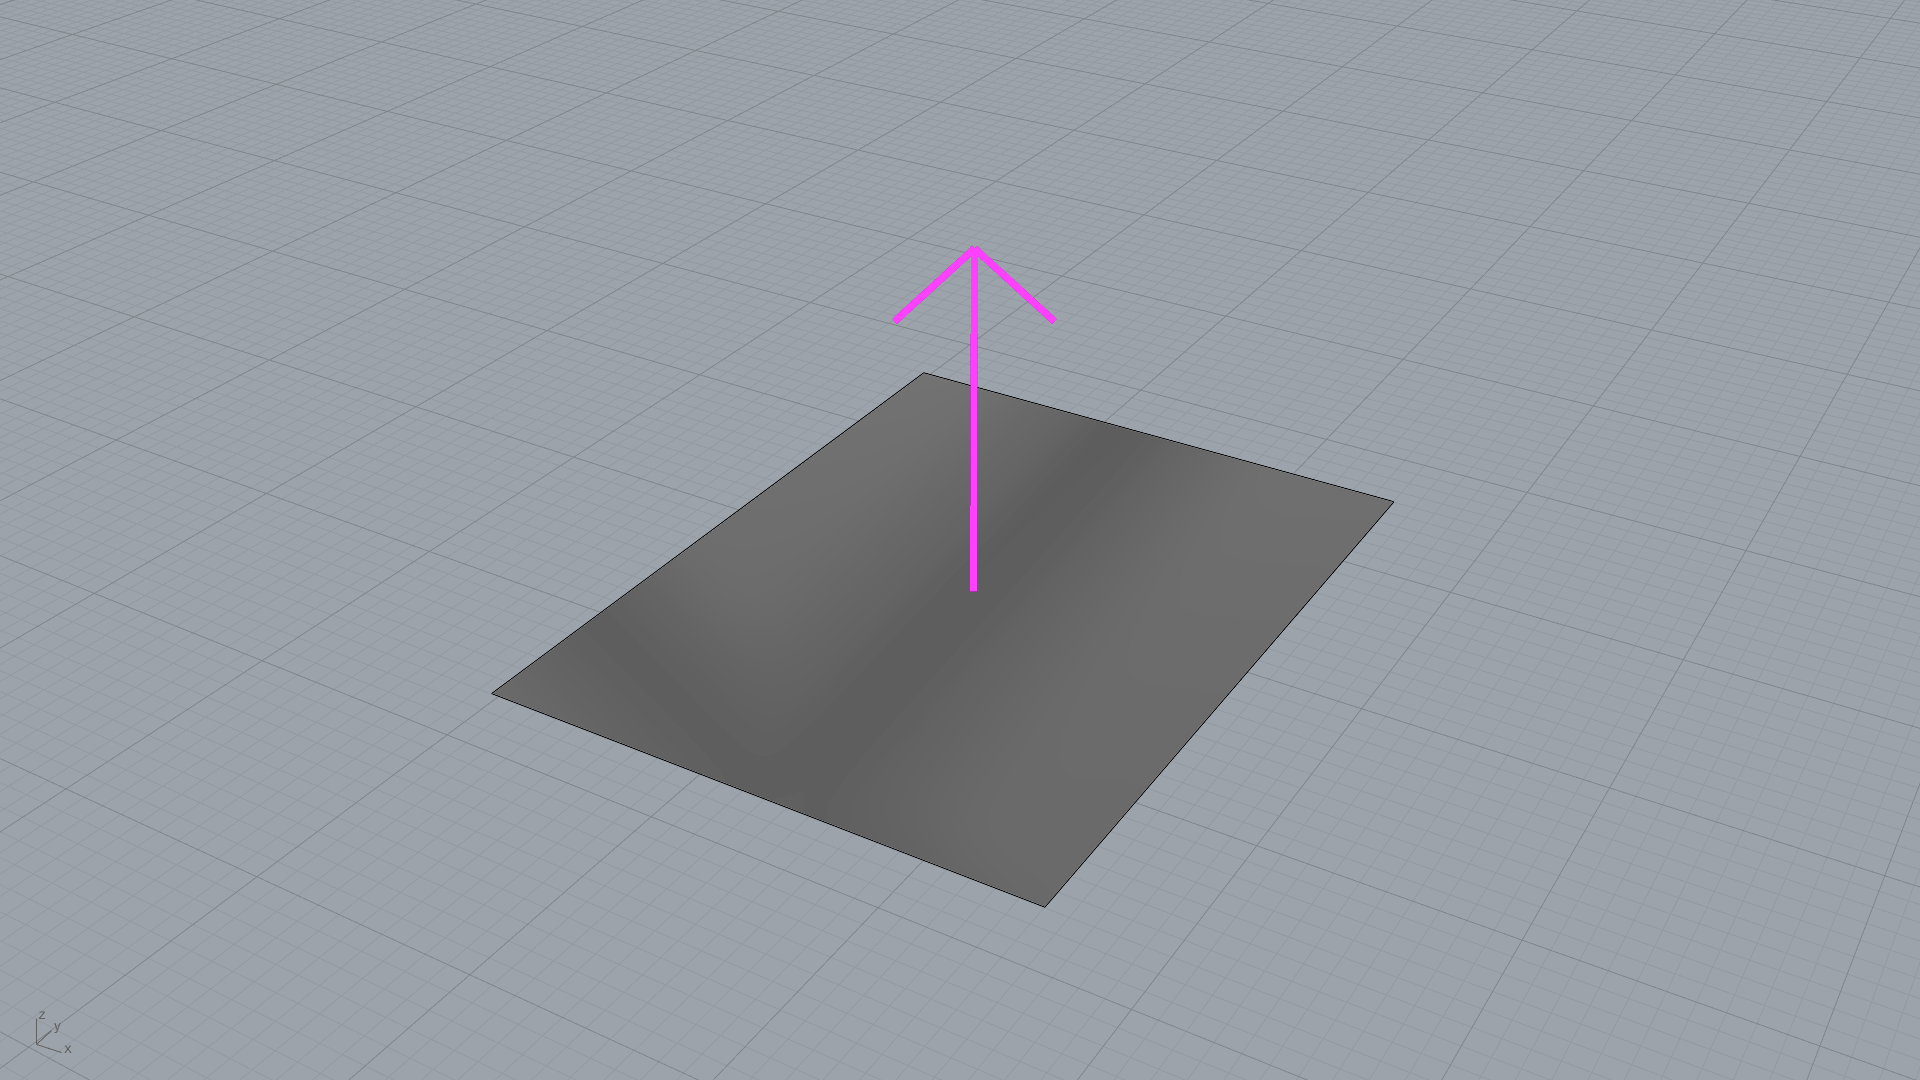
Vectors are mathematical representations, so we can't actually see them in Rhino. That can make it hard to understand what is going on. Which where we can use the vector display or the vector display Ex component to actually see what is going on.
The first component, the vector display component will show you an arrow in the viewport. The size of the arrow is controlled by the magnitude of the vector.
The second component, the vector display Ex, actually let's you customize the arrows more, you can set the scale, the colour, the width.
Vectors from Surfaces
This is my favourite way to work with vectors, mostly because it's so elegant. In the last issue, we looked at the evaluate surface component and how it gave us some vectors on the surface.
Well, this is useful if you ever find yourself needing to rationalize some geometry (make wavy things buildable) or orient things. In fact, was the trick that solved my roof problem from earlier.
Projection for offsetting
Sometimes you don’t want the Z component of a normal. Projecting a vector onto the XY plane gives you a “flat” direction, this is useful for offsetting any geometry from curved surfaces.
Cross Products for “Missing Directions”
Okay, let's get into some math. The cross product will give you a vector that is 90 degrees from two vectors. I typically use it to generate consistent working planes.
Yes, I know, that is confusing. So, let me show you what I mean instead. Let's say you have a very "curvy" curve.
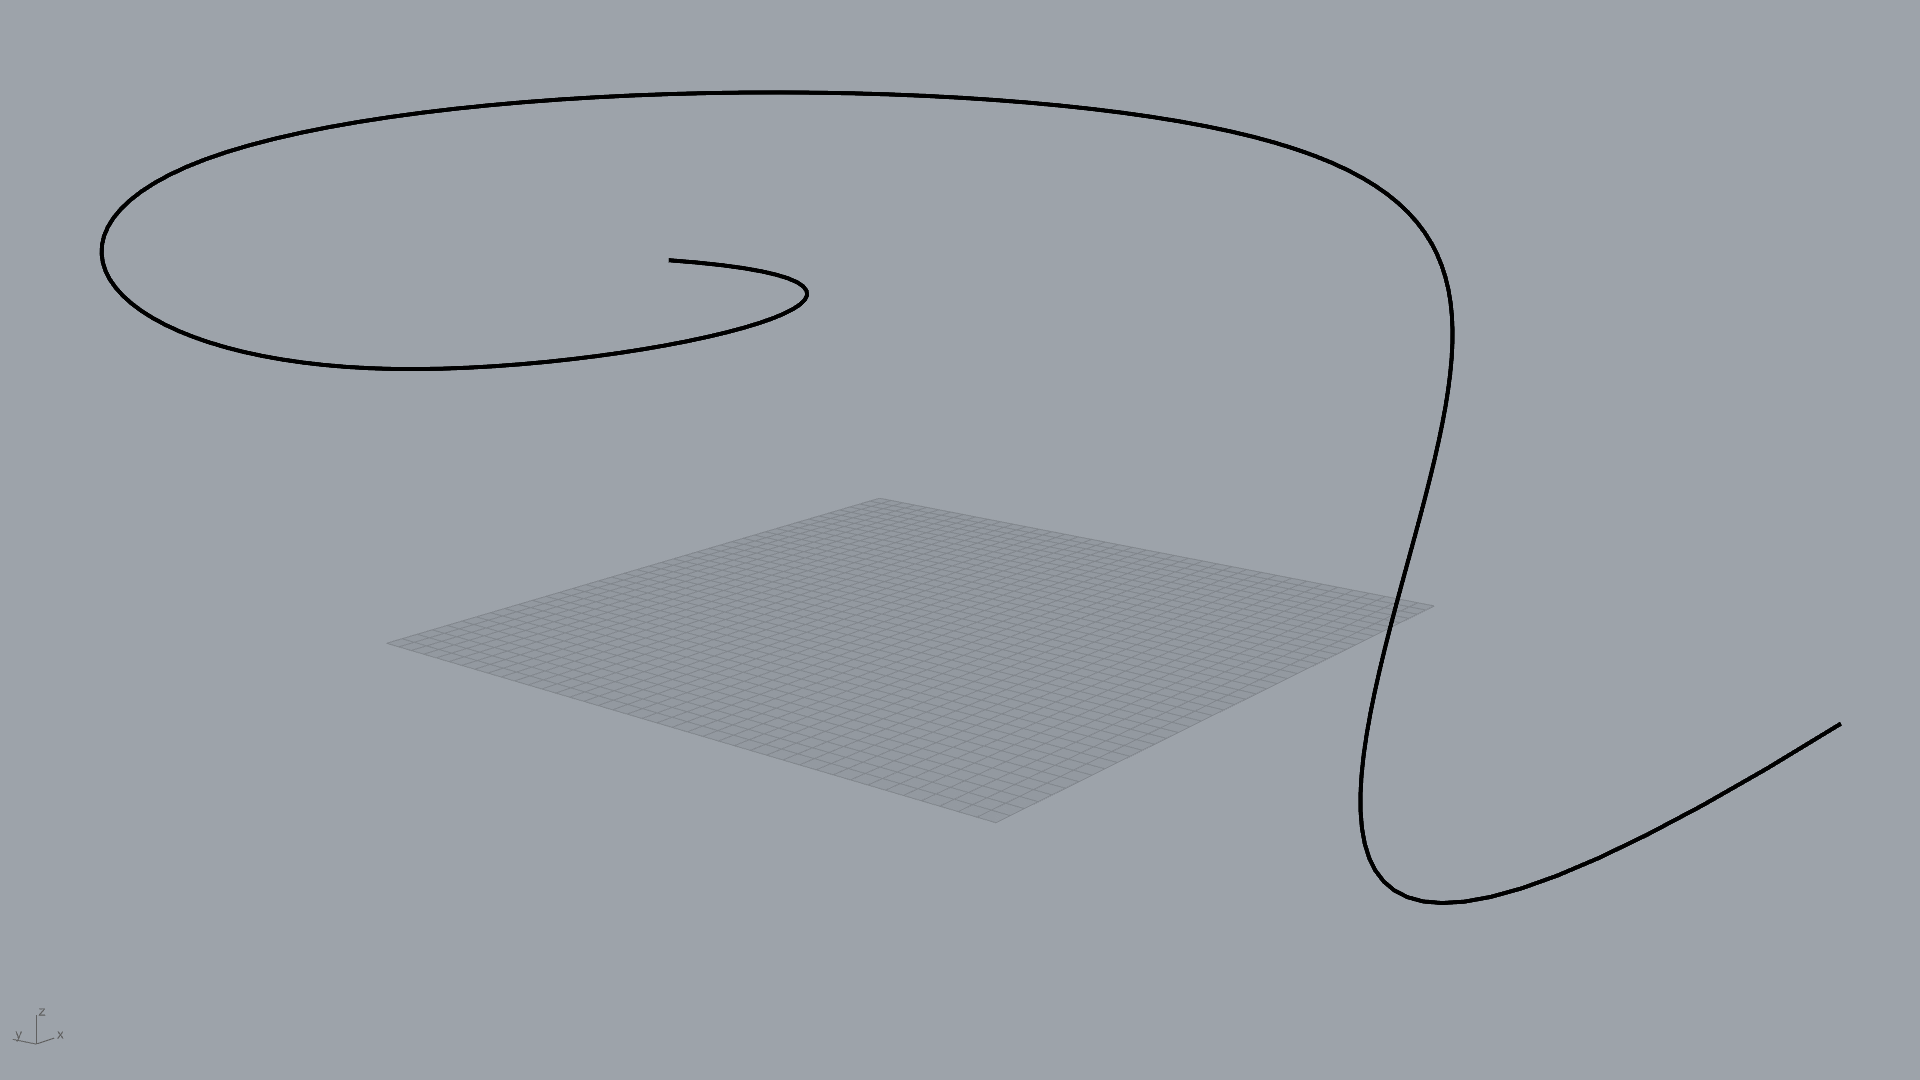
Now, we want the "up" direction of the curve at a few points, how do you get that ?
Well, the fast way is to use the perp frame component in Grasshopper but the result isn't always consistent.
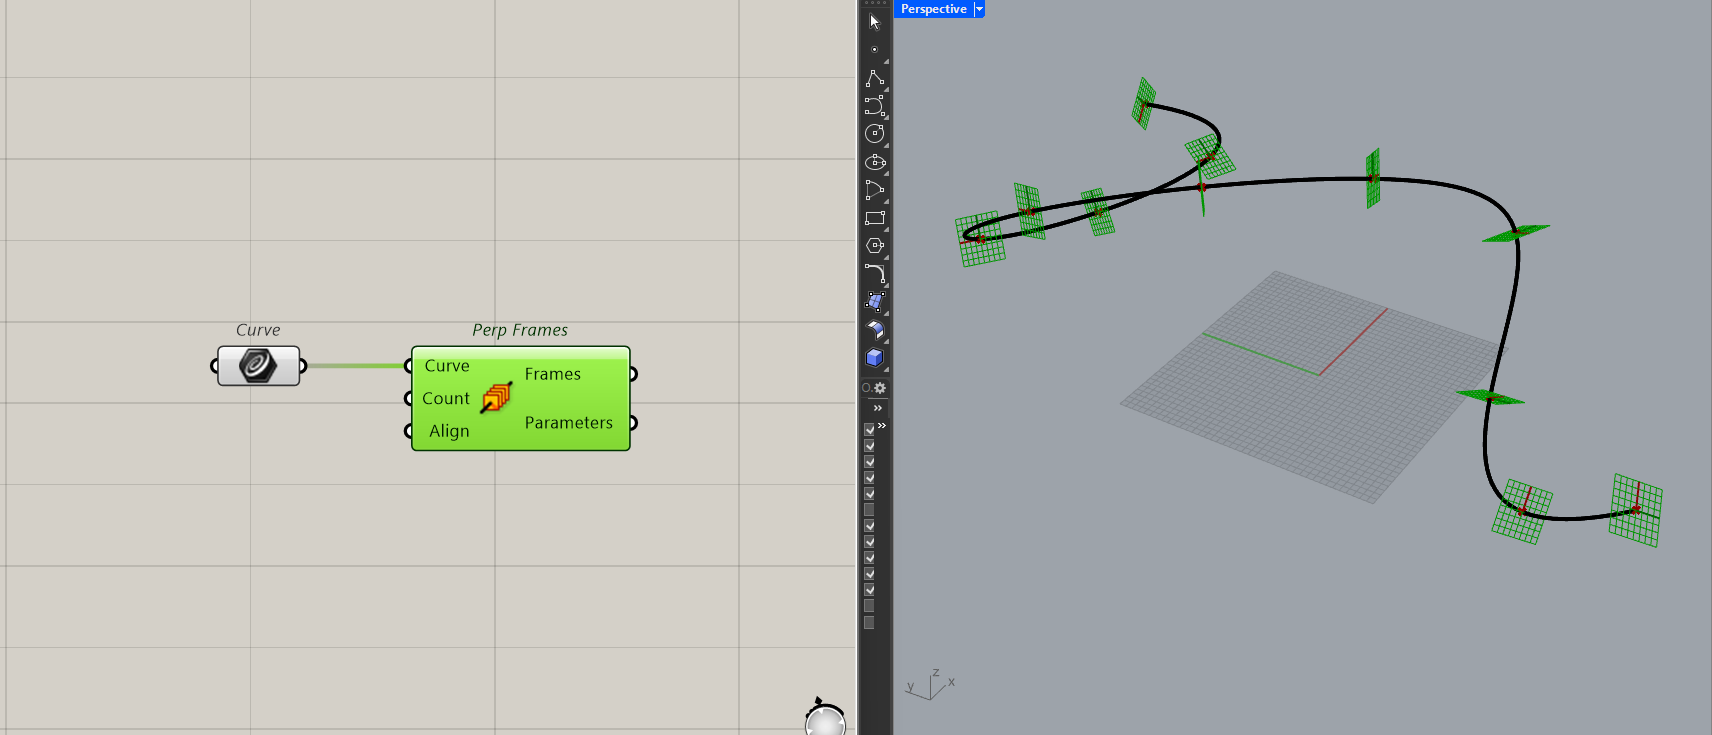
If you can tell from the image, the planes are inconsistent. It would be hard to build of it. Instead, if you take then tangent at those points and cross product it with the X-axis and Z-axis you'll get more consistent planes.
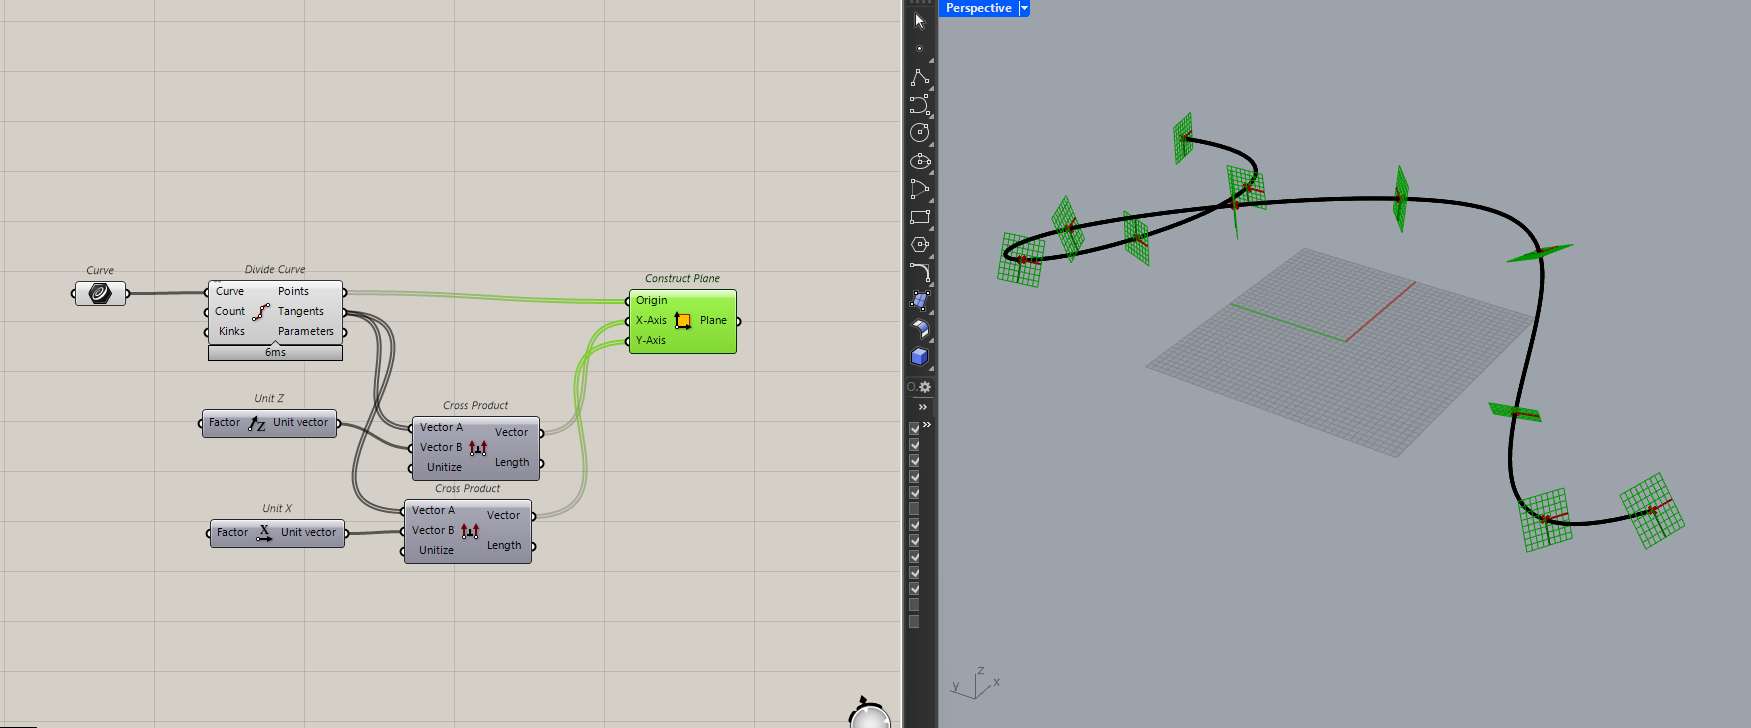
I'll put the two side by side in a different colour, just to make this clearer.
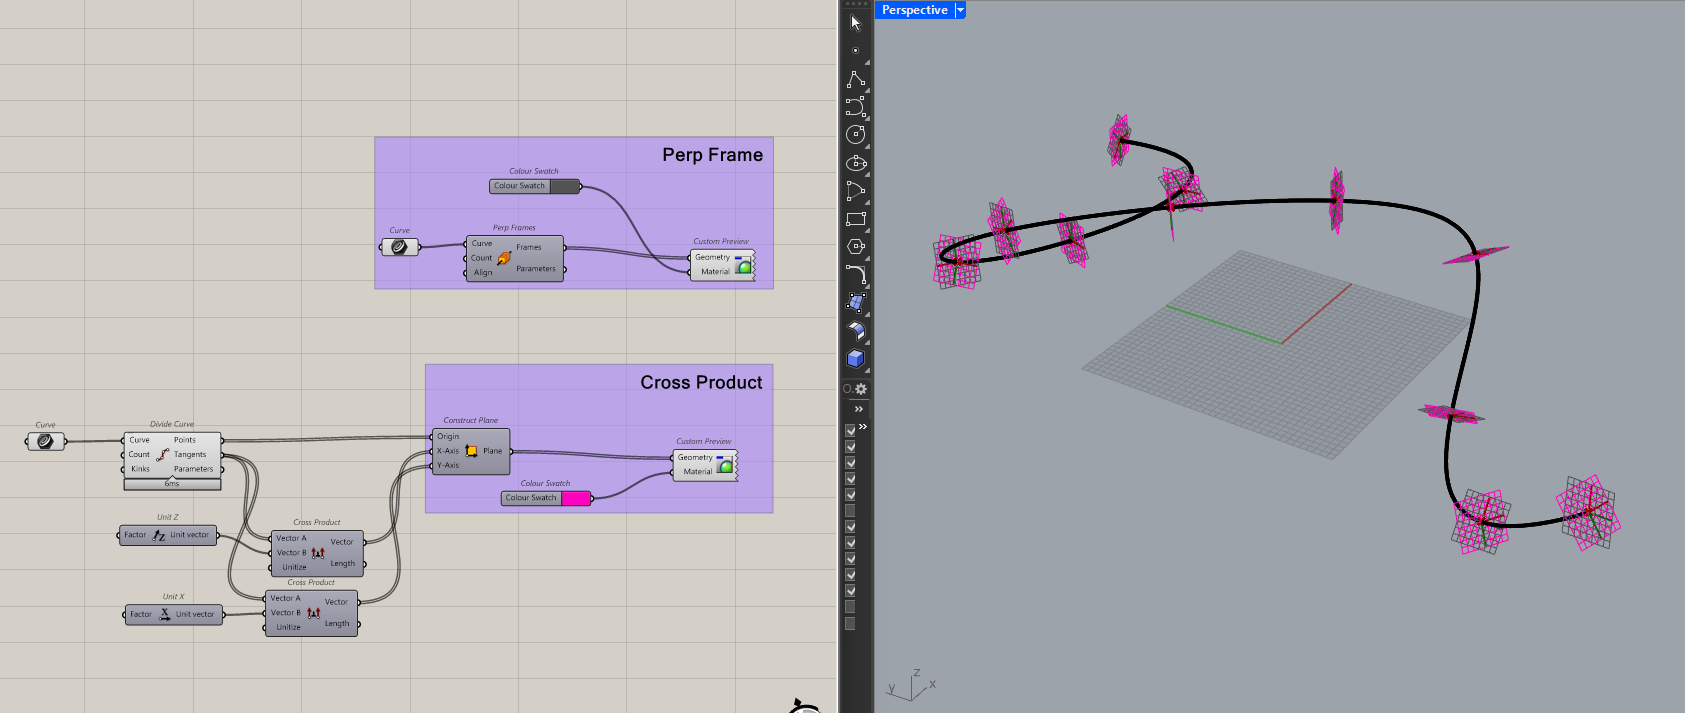
It's not that you should never use the perp frame component, it's just inconsistent when you have complicated geometry. Using cross products just gives you more control over how those planes get created. And that is what using vectors is all about, just getting more control.
Dot Products for Alignment Checks
Alright, the last "math heavy" operation is the dot product which is good at testing for alignment.
The dot product measures the angle between vectors and will always give you an answer between -1 and 1 which is easier to interpret than using the actual angle.
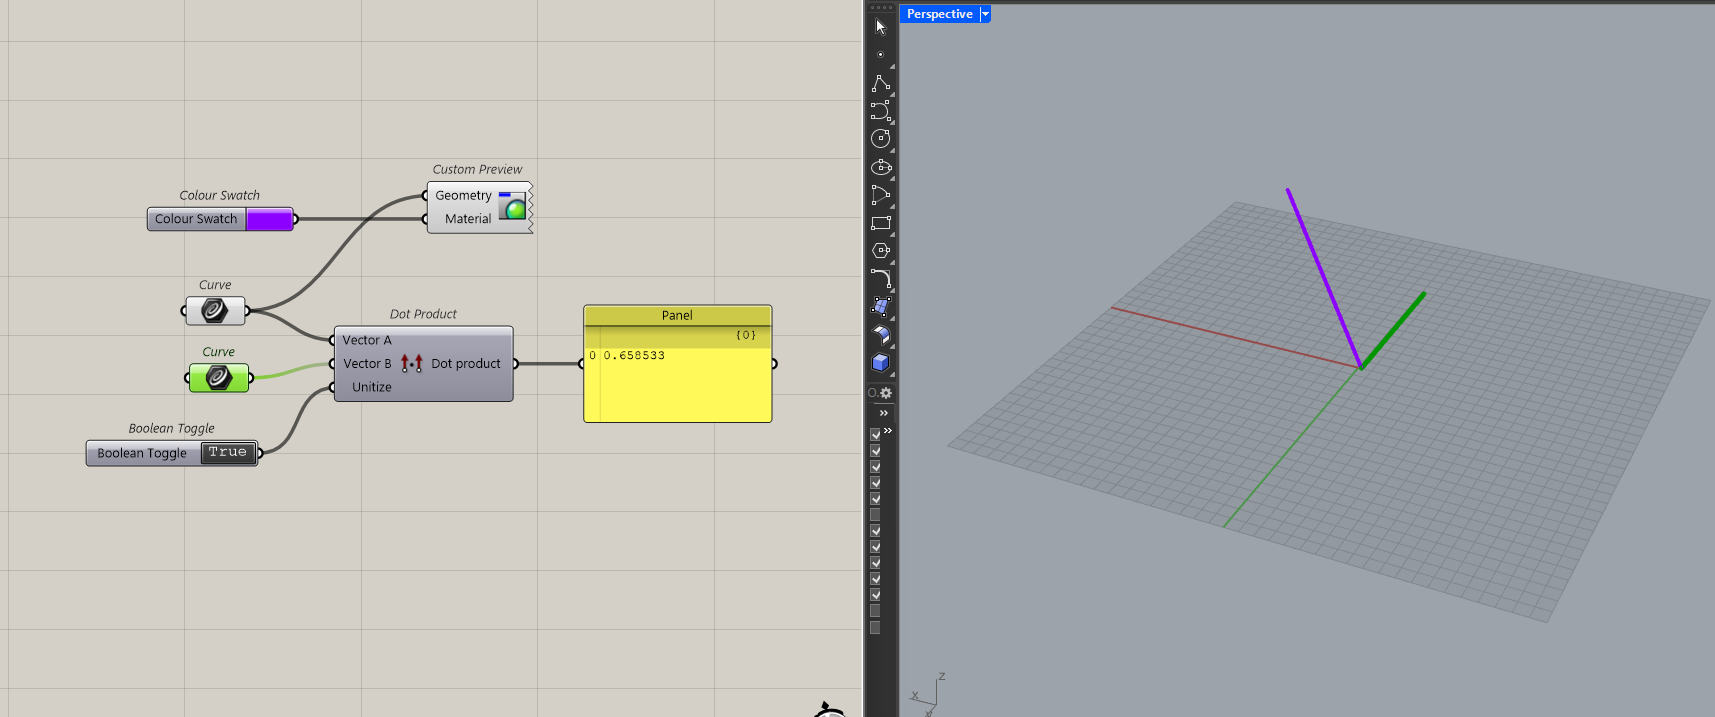
It's best to always unitize the vectors for this. Because the result is always scaled by the vector's magnitude
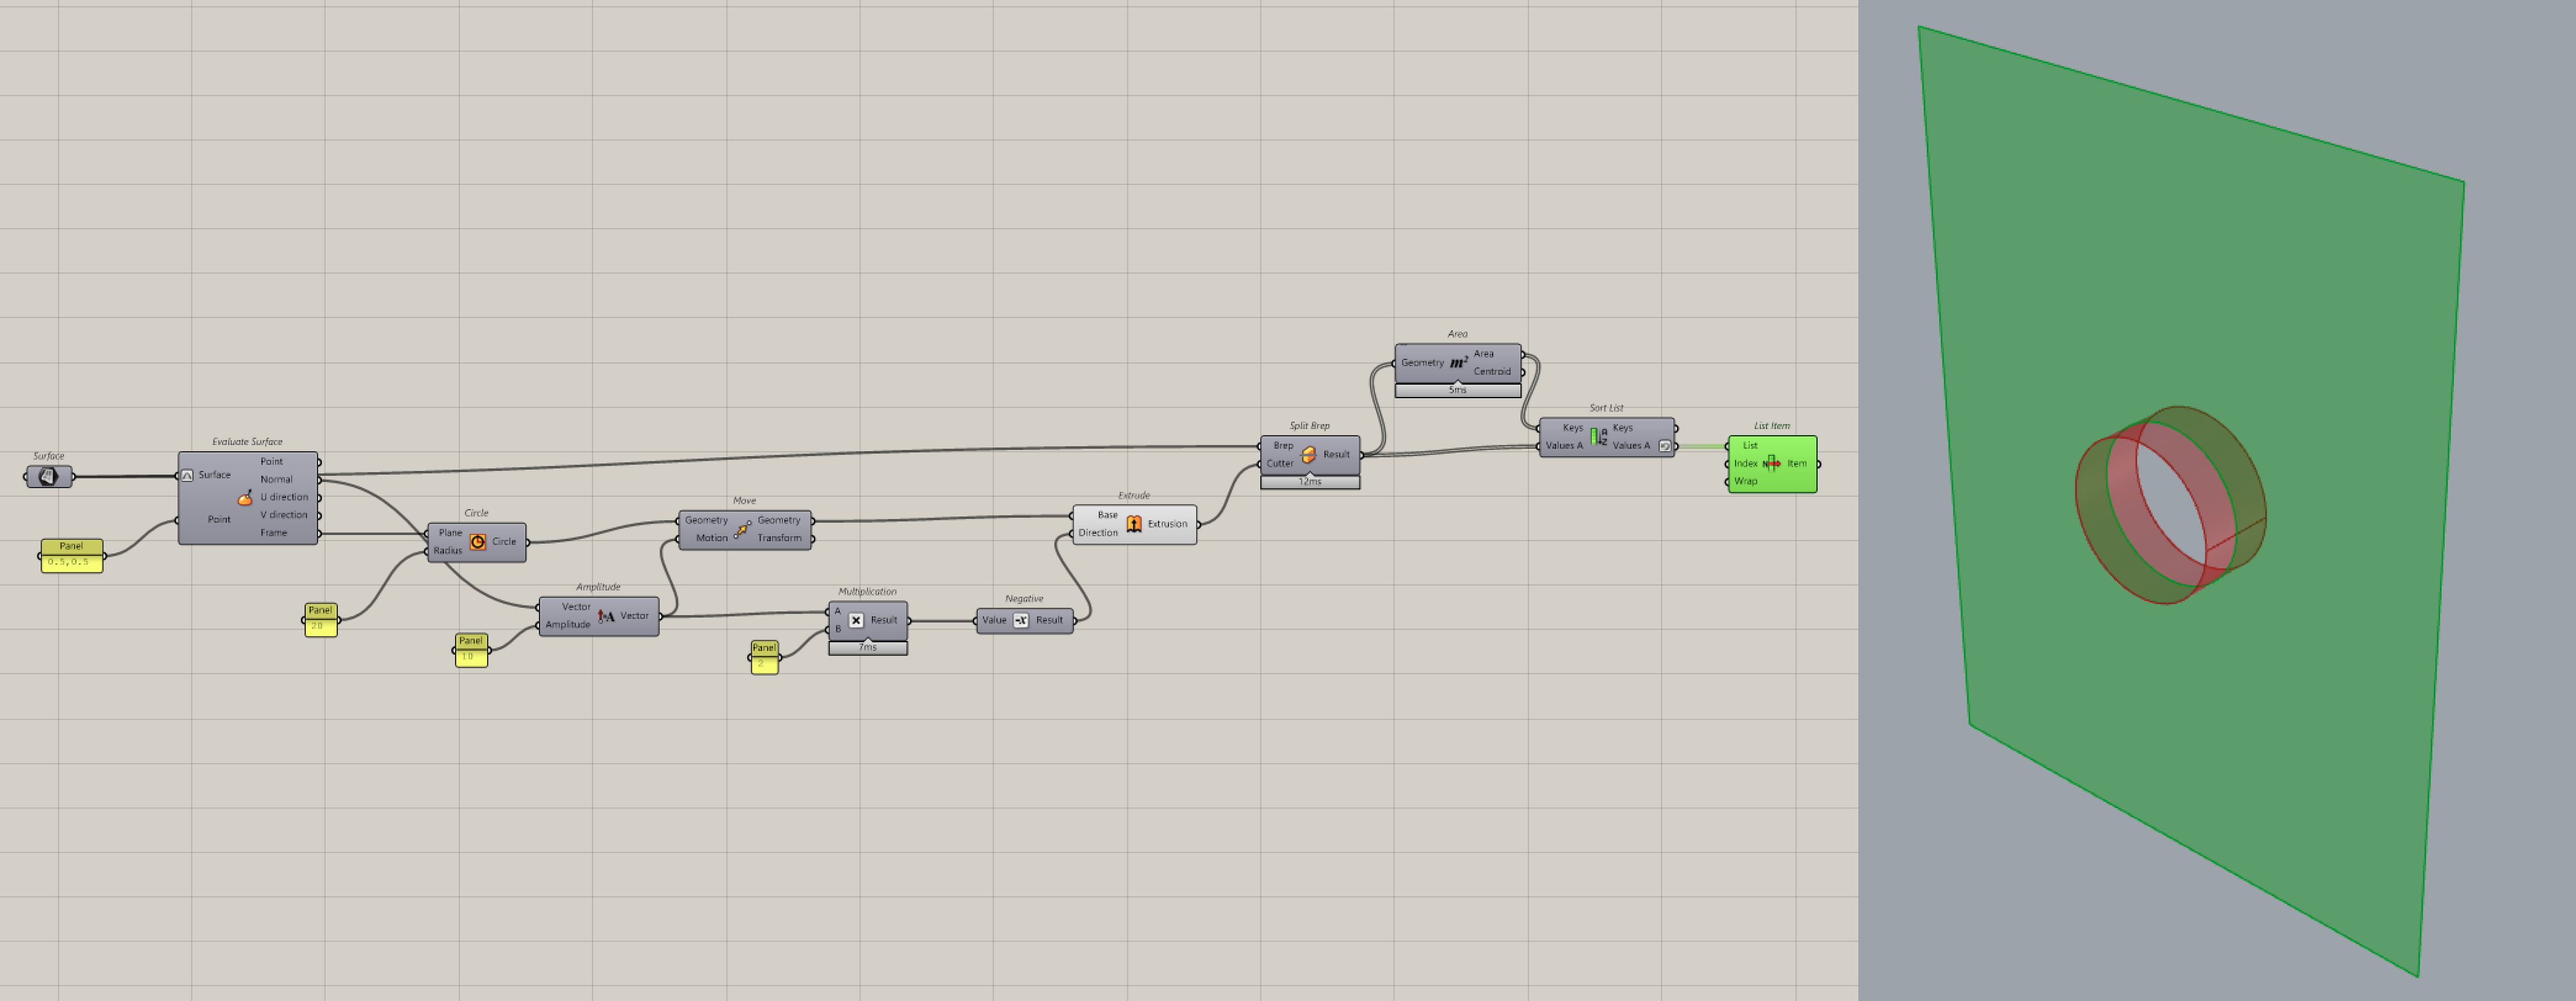
Here's an example. Let's imagine you have a solid of some kind and you only want the horizontal faces. Because I work with buildings, floors often come in as solids and I find myself needing to extract the horizontal faces all the time.
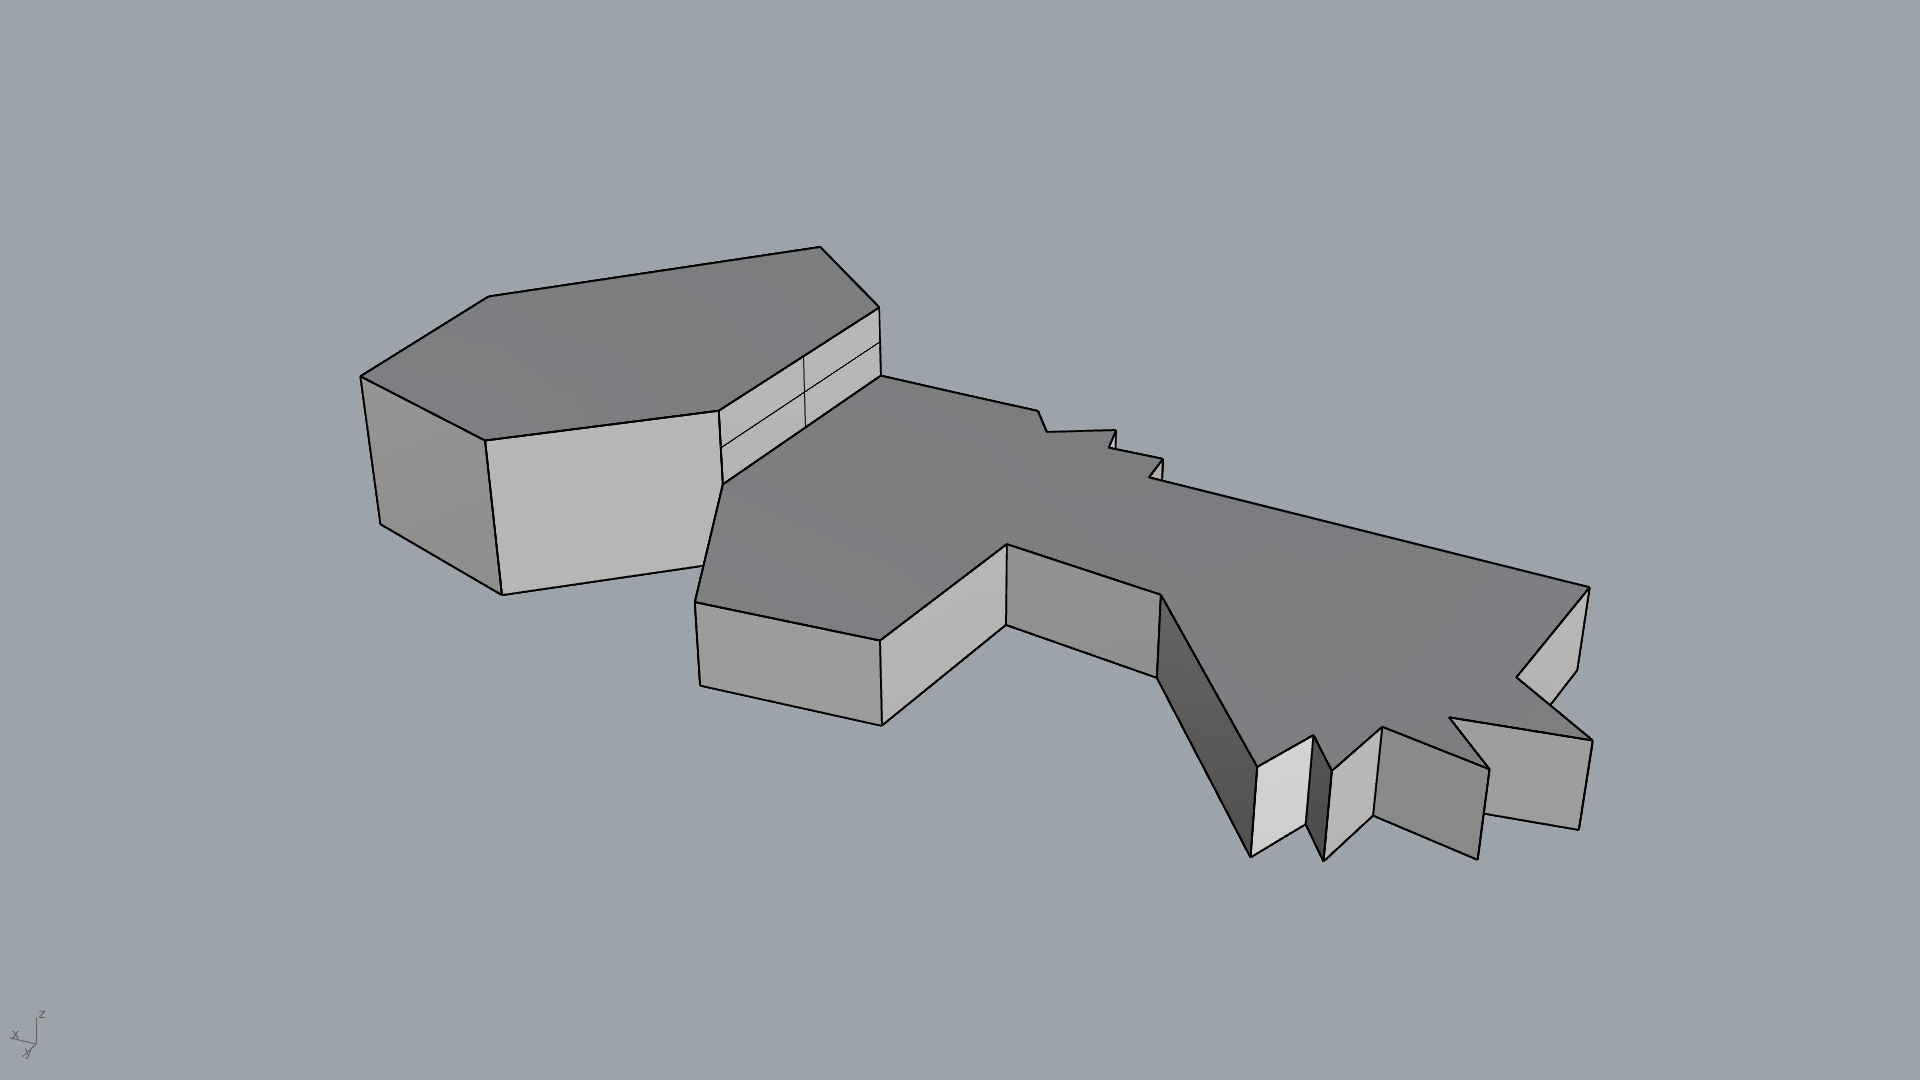
Then to extract the horizontal surfaces, we can use the dot product of the normal of each face with the Z-axis. I can then cull any face that doesn't meet the requirement.
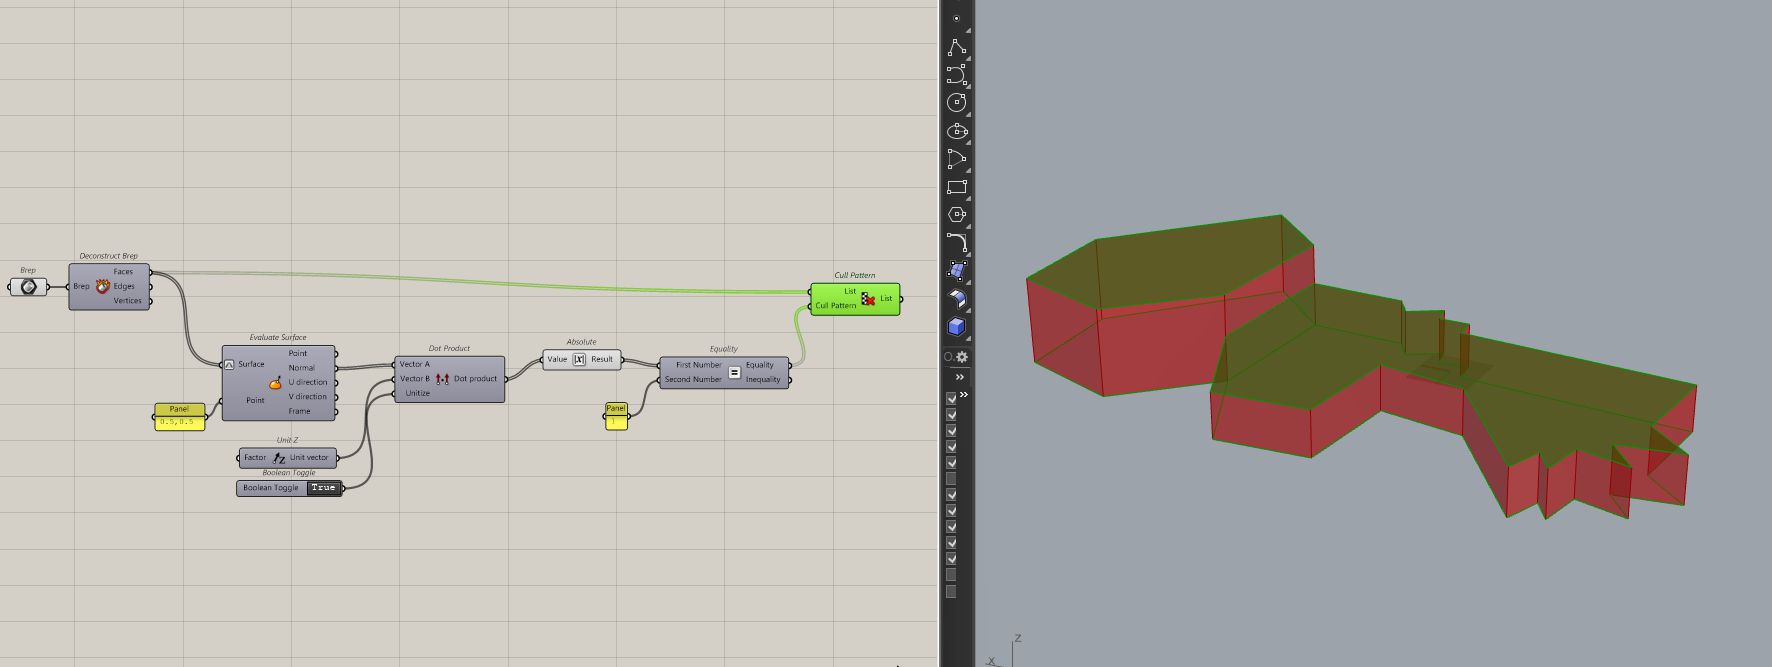
Here I am checking if the normal of the faces match the Z-axis but you can just as easily replace the Z-axis with any vector.
Final Thoughts
Working with vectors will take some getting used to but with experience, it will become second nature. If you ever find yourself stuck with modeling something, try referring back to this article and see if any of the vector methods may help you.
A lot of this comes down to knowing then to use the right tool and that will only come when you have situations to try new things. So try playing around with cross products or dot products and you might just find a new way of working.
If you found this useful, subscribe to CodedShapes.
I’ll send you my free guide on applying computational design at work as a thank you