

How Surfaces Really Work in Rhino
and why that matters.

This article is part of the basics of Computational Design series. Even if you don’t use Grasshopper or Dynamo every day, understanding the fundamentals can help you spot where they might be useful in your work.
Part 1 : The three vital numbers in computational design
Part 2 : A Beginner’s Guide to Curves in Computational Design
Part 3 : How Surfaces Really Work in Rhino and Why That Matters (here)
Part 4 : What Are B-reps in Rhino, and Why Do They Matter?
Ah, surfaces.
Maybe the most misunderstood geometry type out there. Similar to curves, how a surface is defined might matter more than how it looks. Also like curves, you can stuff all the control points and isocurves you want to make it look right, but try editing it and you’ll quickly see that it's a nightmare.
What is a surface ?
Surfaces are made from at least two control curves. One in the U direction and another in the V. These directions are like the XY axis of the coordinate system but localized to the surface. Which one is U and which is V? Depends on how the surface was made. And that’s fun part.
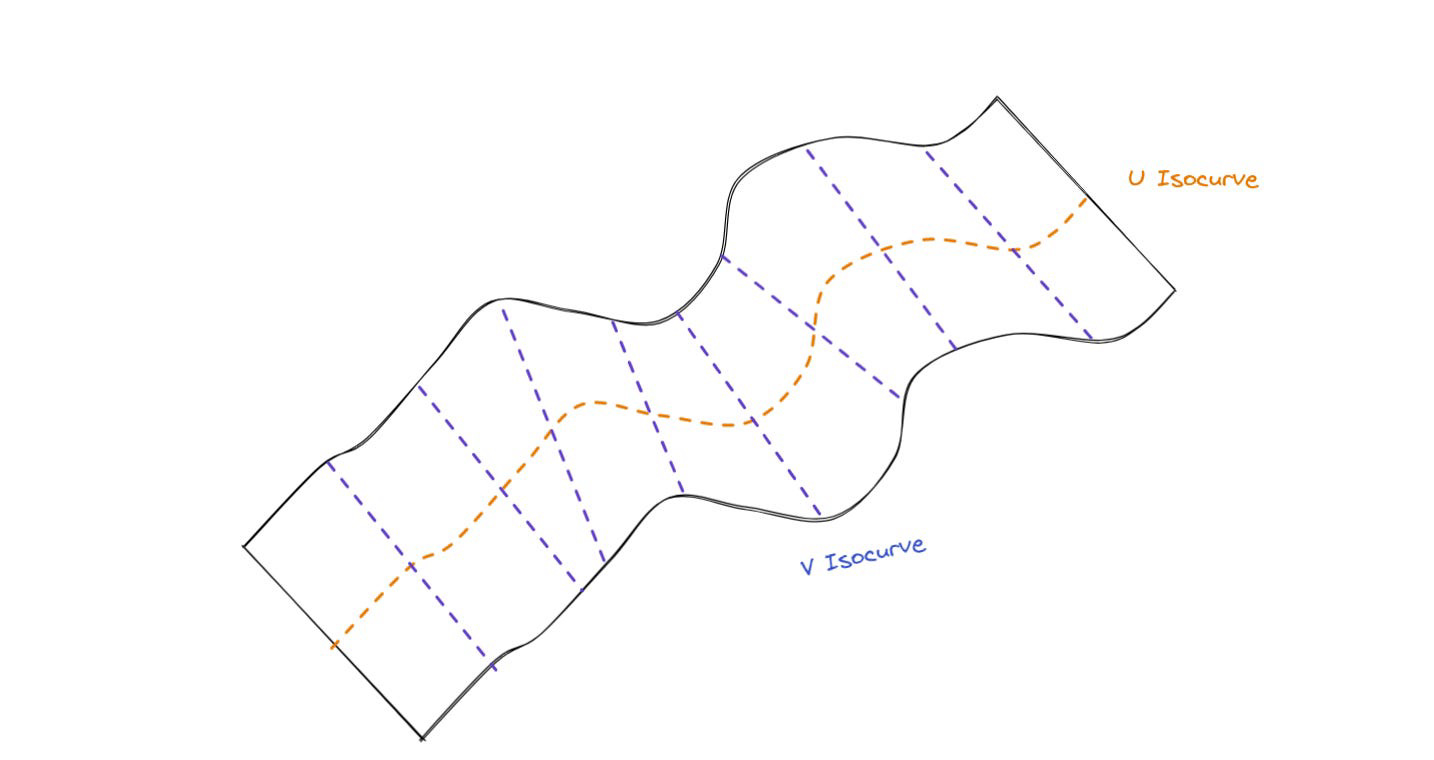
The curves you see running through the surface are called isocurves. They are clones of the original control curves in the U and V directions. While they don’t actually affect the surface itself, they give you a visual clue into how the surface is defined.
Making a surface and why it matters
With curves, you start from control points. With surfaces, you start from curves. But the method you choose to create a surface (loft, sweep, planar, etc.) can actually set the definition of that surface. Understanding how each method creates a surface is essential to be able to edit it later.
Let's walk through a few ways Rhino / Grasshopper creates surfaces.
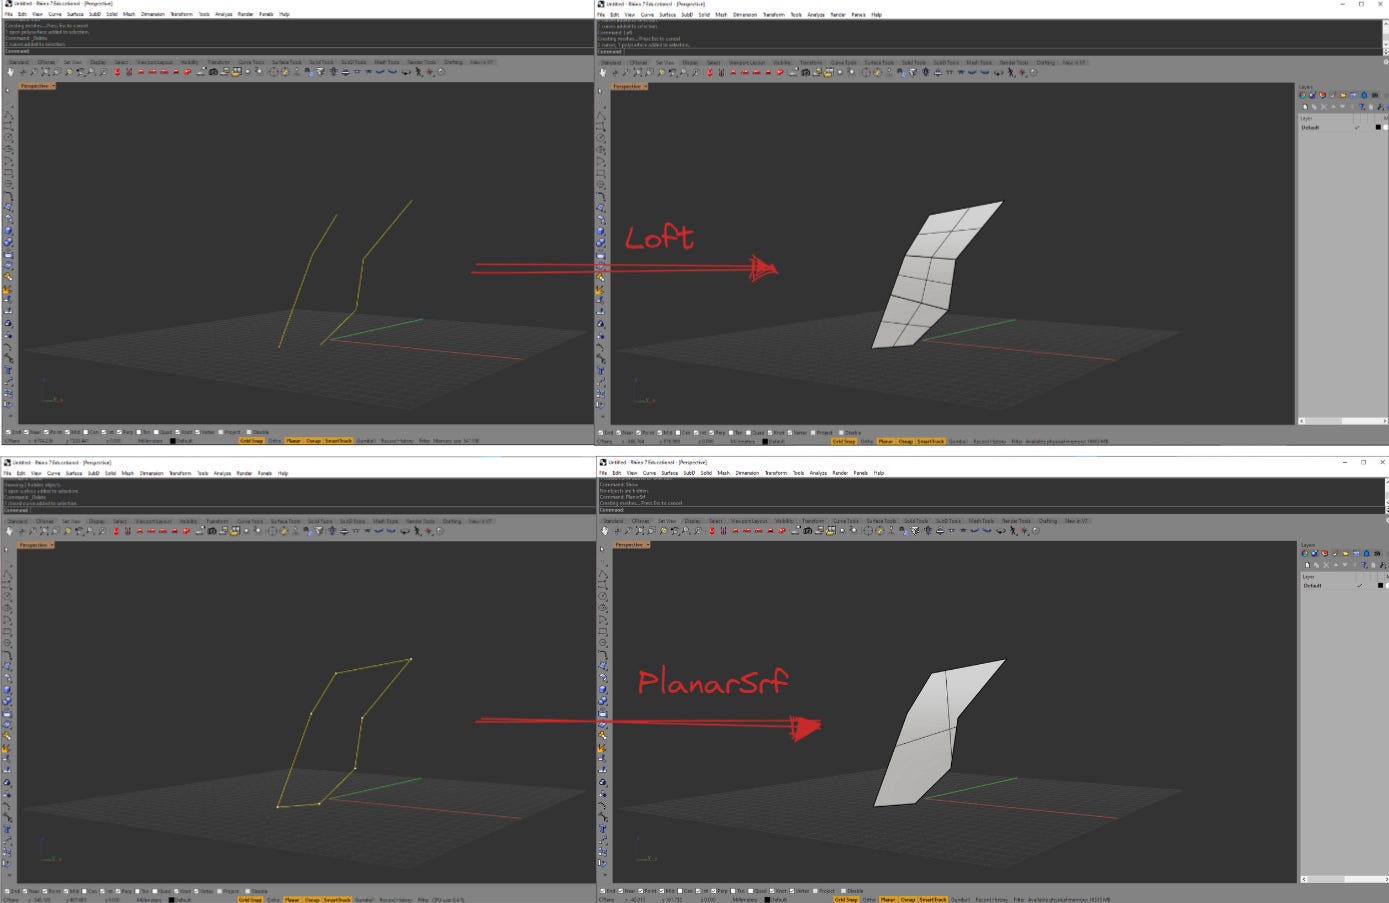
Loft
Probably the most common way that people build surfaces. And it's my favorite way too. Pass in two or more curves and Rhino will loft a surface through them.
Behind the scenes, Rhino figures out the U and V curves based off the curves you gave it and stitches into a surface. You even get some options on how exactly it blends between the curves.
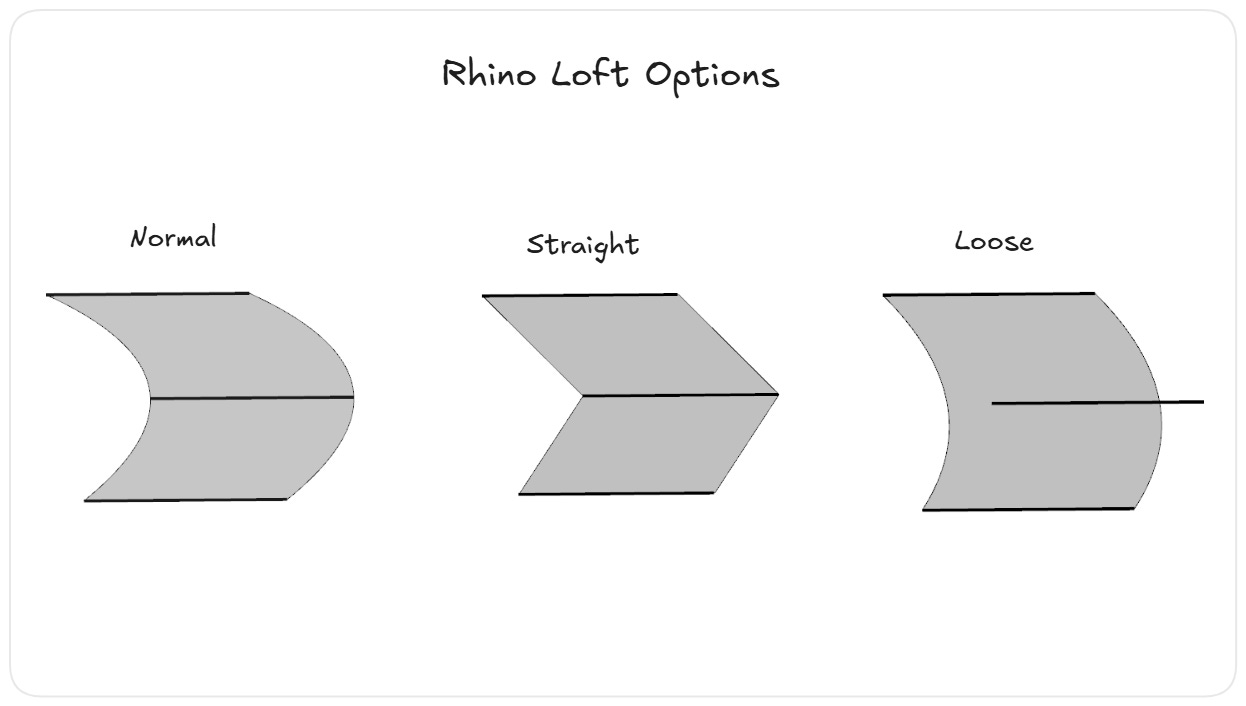
I like the loft method because it's easy to use and I think it's one that most people understand well.
Sweep
Sweeping is similar, but you have more control. It takes in a rail and a profile curve, it then takes the profile curve and sweeps it along the rail to create the surface.
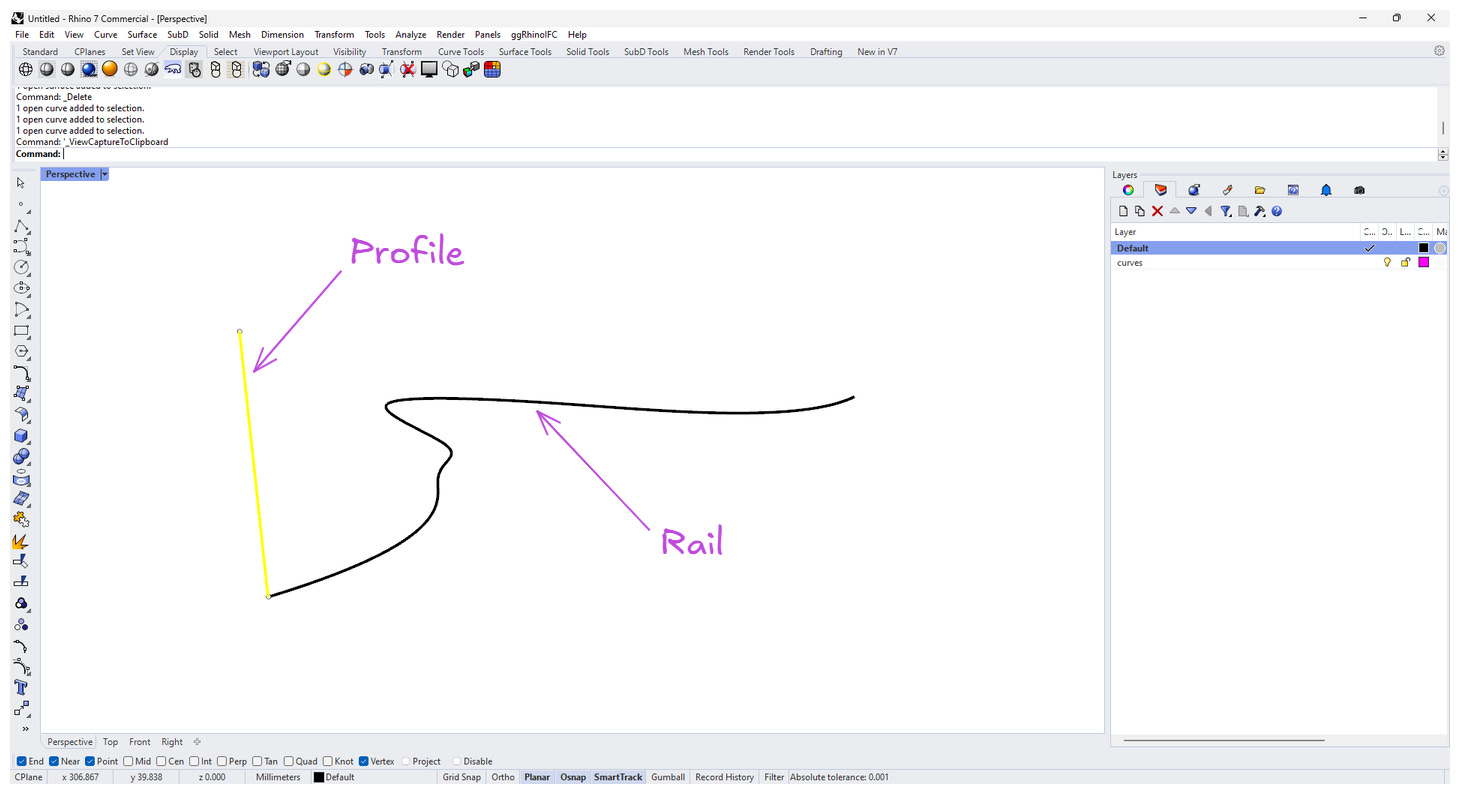
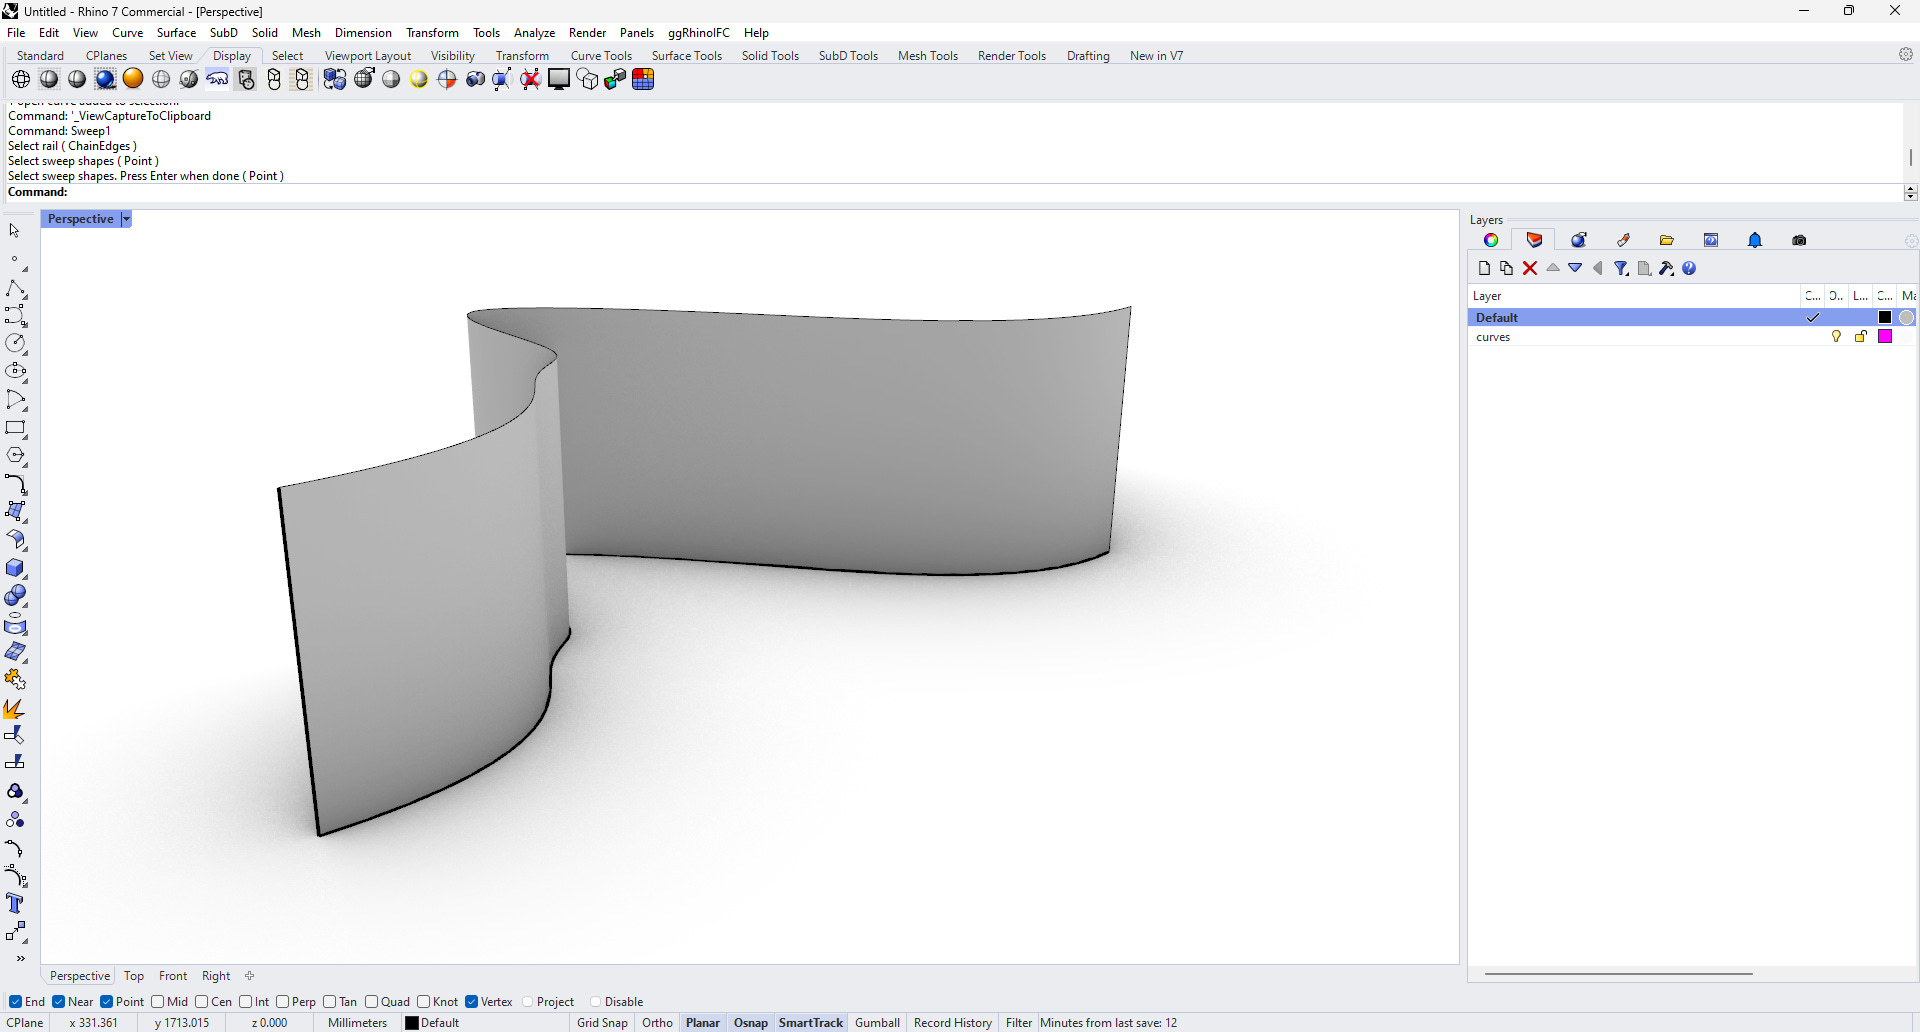
This usually gives you cleaner results, since you're supplying both the U and V definitions yourself. But it also needs more setup, and in practice, it’s trickier to use consistently.
Things also aren't as easy if your rail has kinks in them but Rhino normally does a good job at sorting them out. There is also a sweep2 method that let's you specify two rails instead, which will help create an even more accurate surface.
Planar Surface
The quick and dirty method. The PlanarSrf command. It takes any closed planar curve and turns it into a surface.
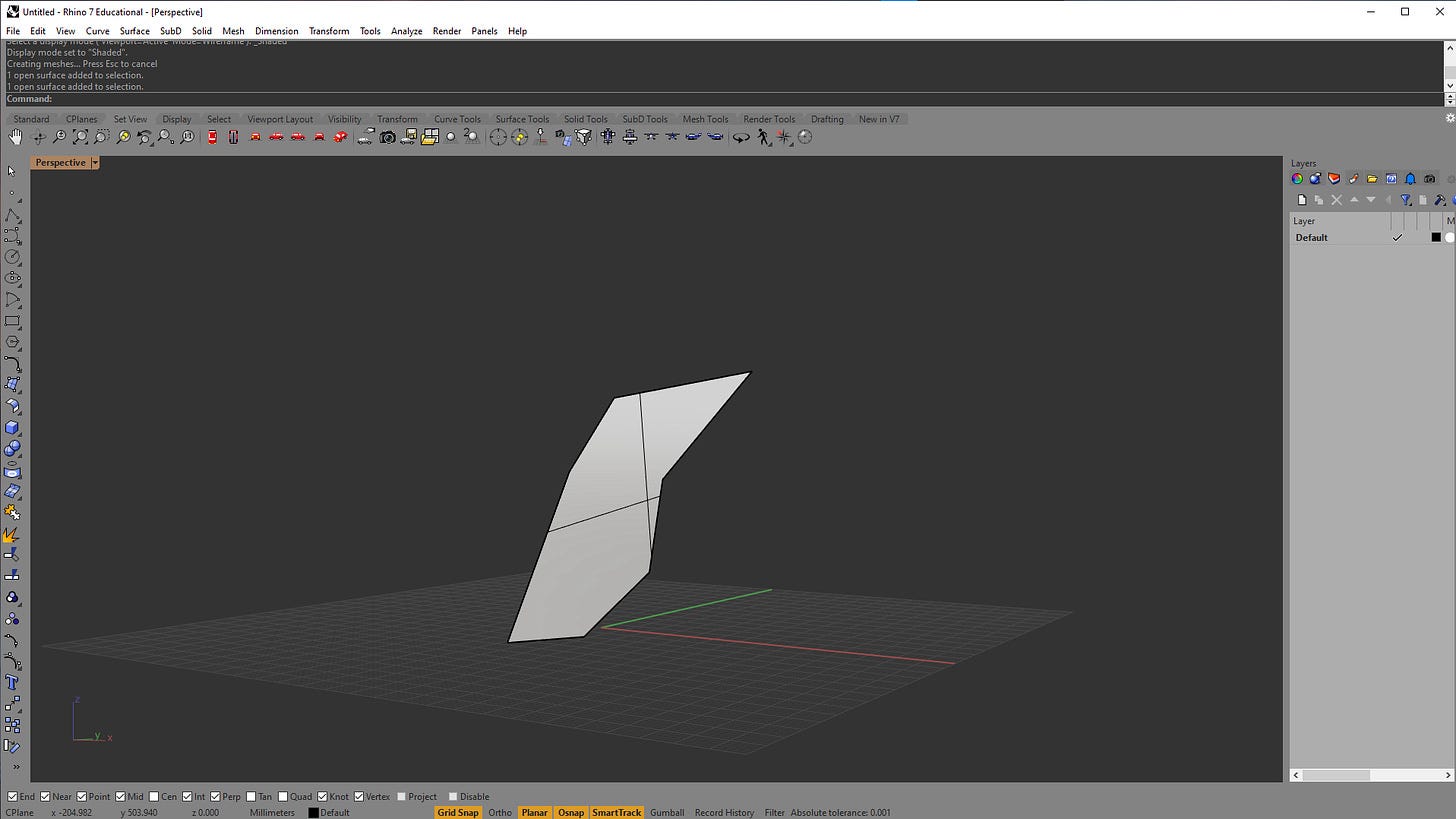
But look at the isocurves. They look incomplete or like the shape is cutting them off. That's because Rhino isn’t creating a surface from your curve. It’s making a big rectangle and trimming it to the shape. It's the difference between a trimmed and untrimmed surface.
Trimmed vs untrimmed surfaces
A trimmed surface is when Rhino creates a full surface and then hides everything outside the shape. An untrimmed surface is just a regular surface. This is Rhino's way of reducing the amount of data needed to define a surface. Instead of keeping complicated control curves, it just has to keep a rectangle and a curve.
We can actually see this difference if we used the loft command to create this surface instead.
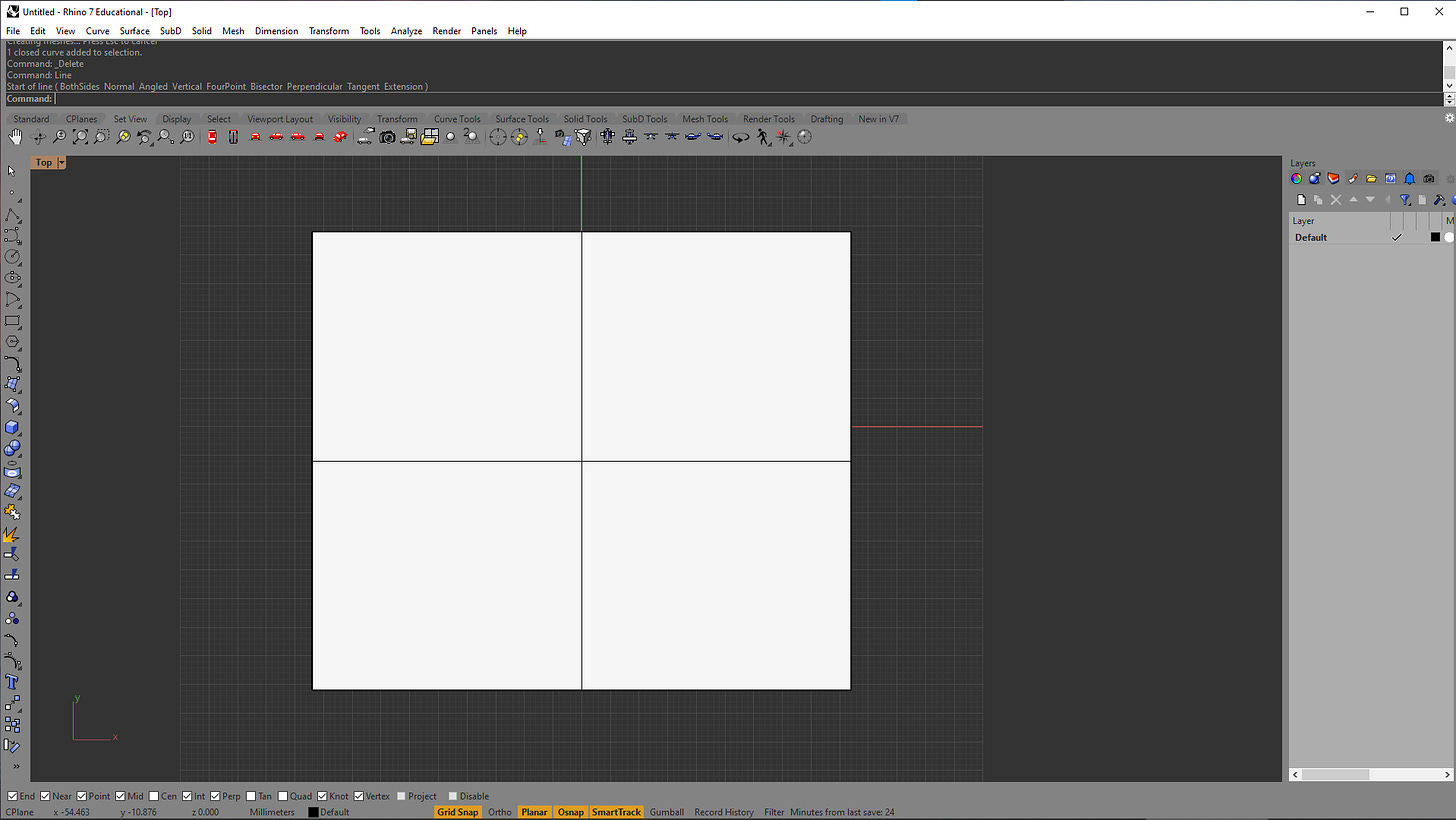
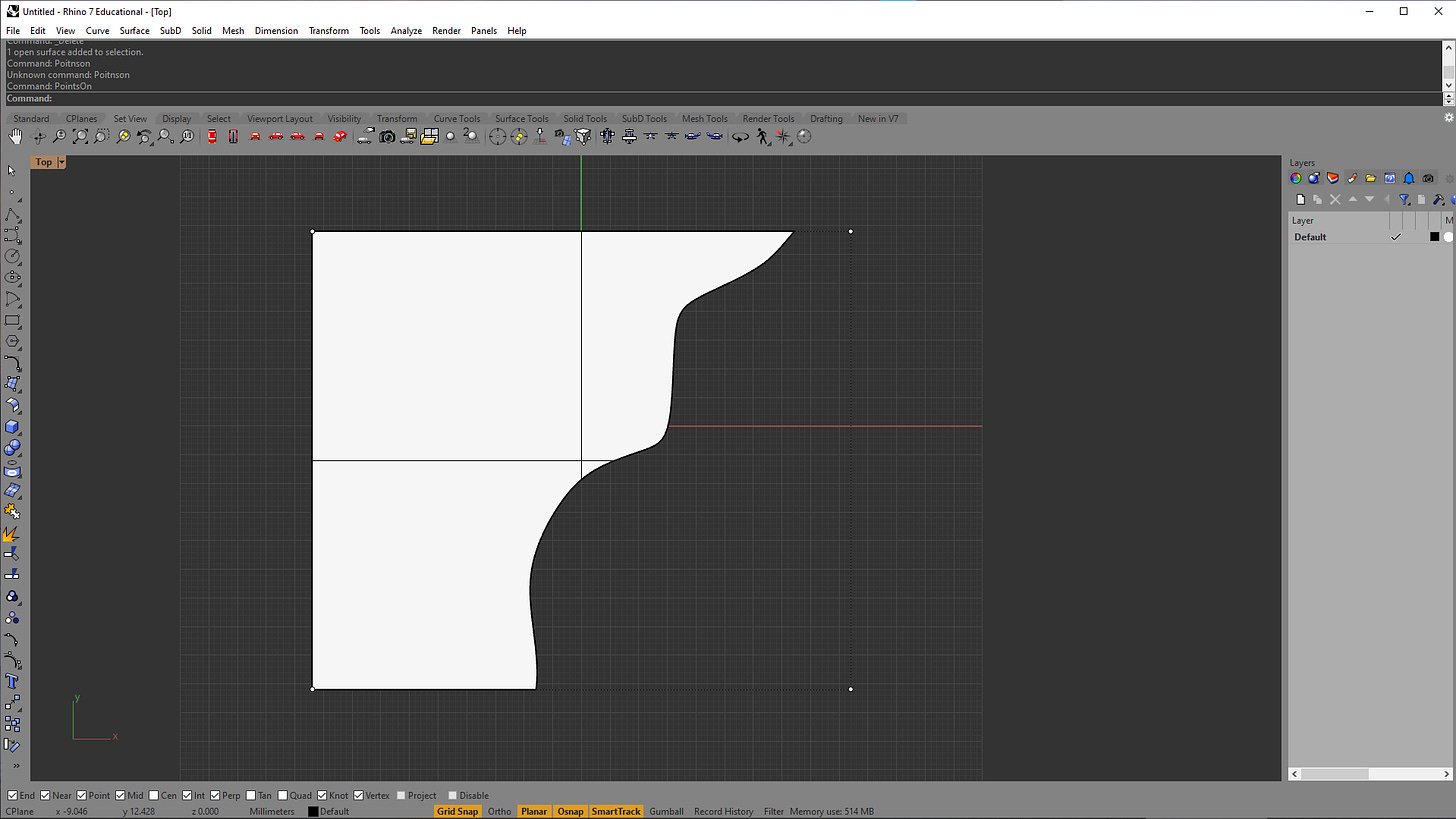
Okay, that's confusing, so let's look at a clearer example. Let's start with a normal rectangular surface. It shouldn't matter how it was created but just for context this was done with a loft between two lines.
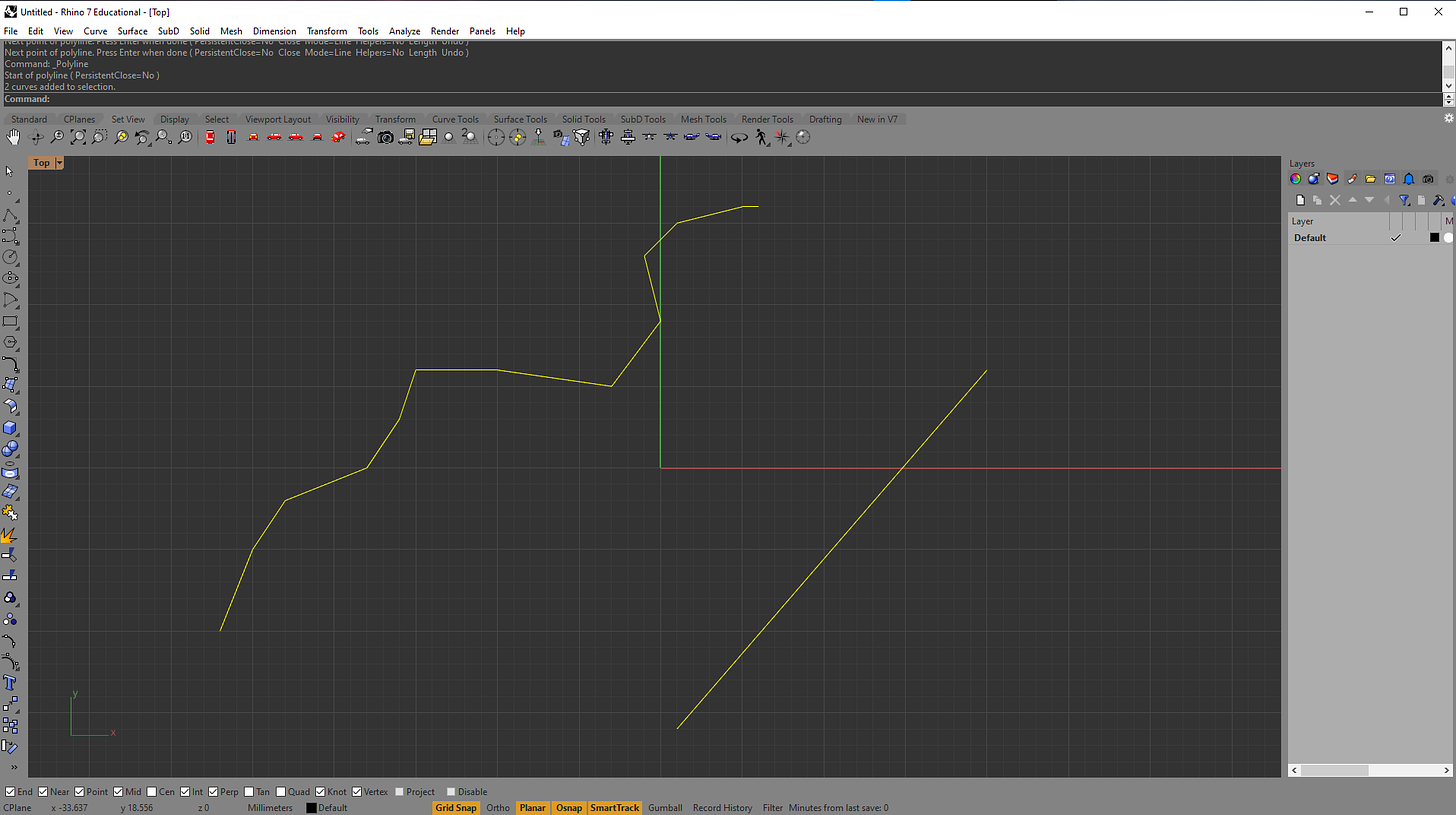
Now, let me draw a squiggly curve through this rectangle.
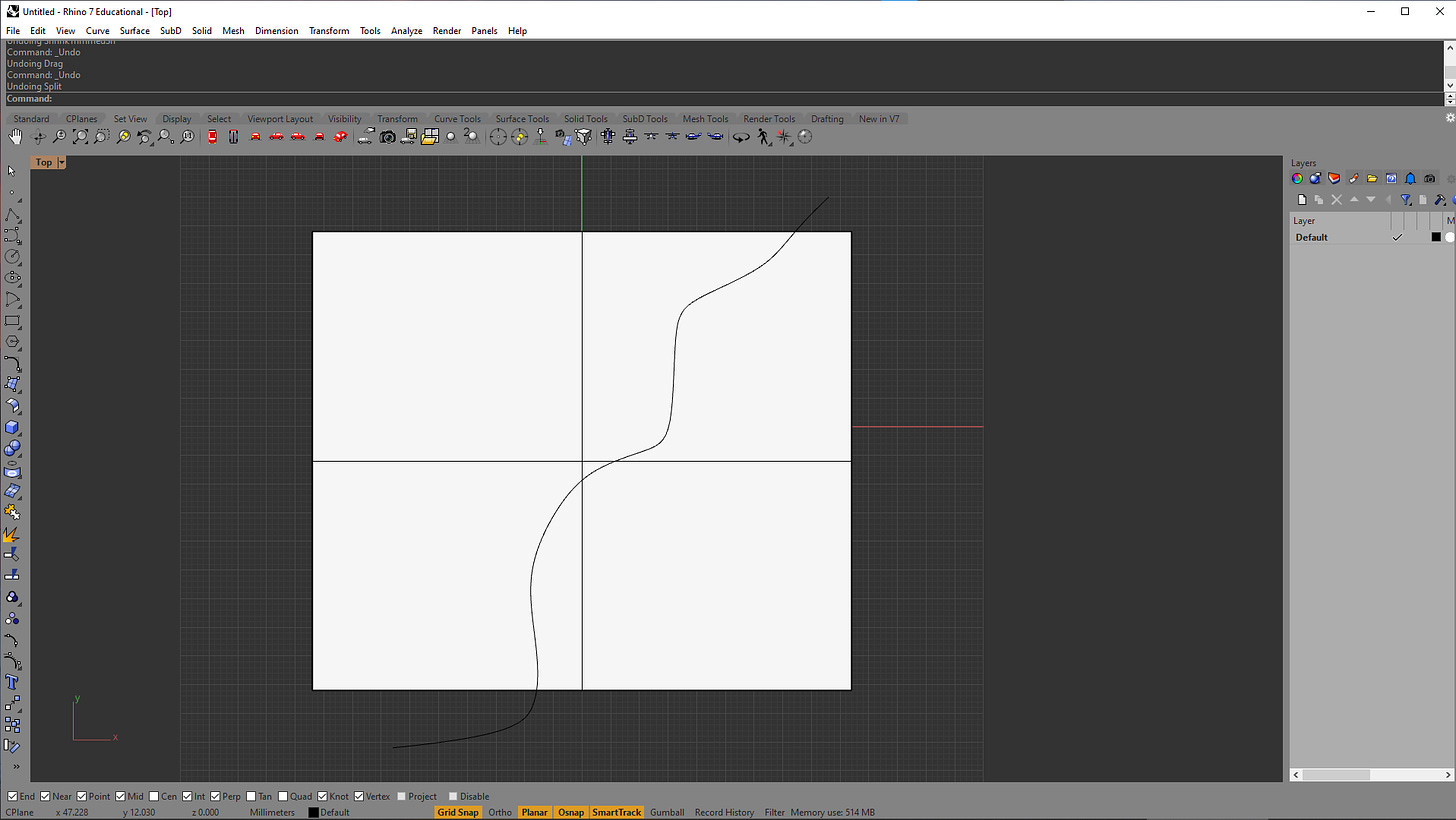
I am will then run the split command to cut this rectangle by the curve. This is what I get.

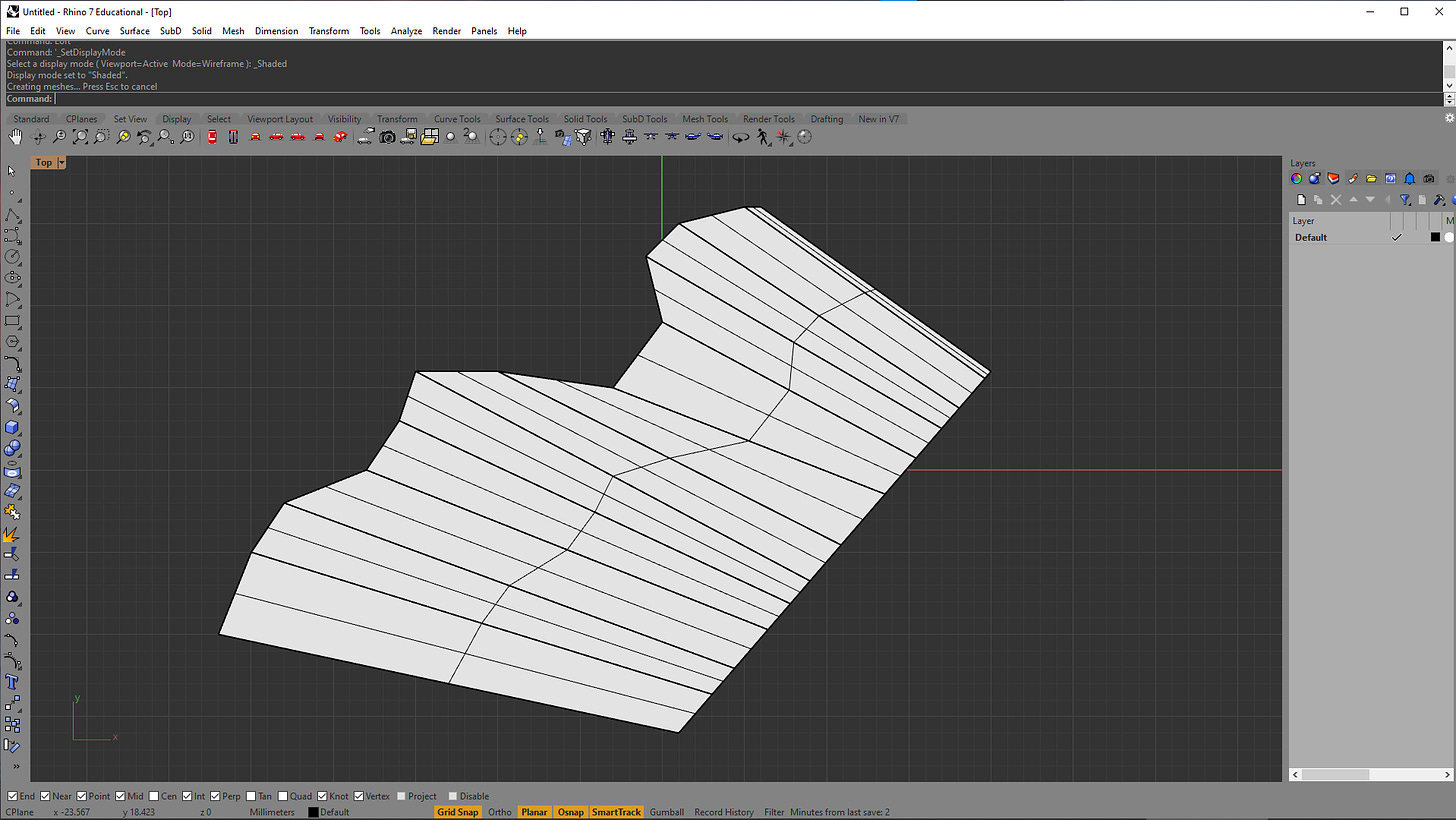
You’ll see that the shape changes, but the isocurves don’t. That's because it went from an untrimmed surface (the rectangle) to a trimmed surface (the "cut" rectangle). Rhino didn't change the definition of the surface, it just hid a portion of it.
You can even see the original control points with the PointsOn command.
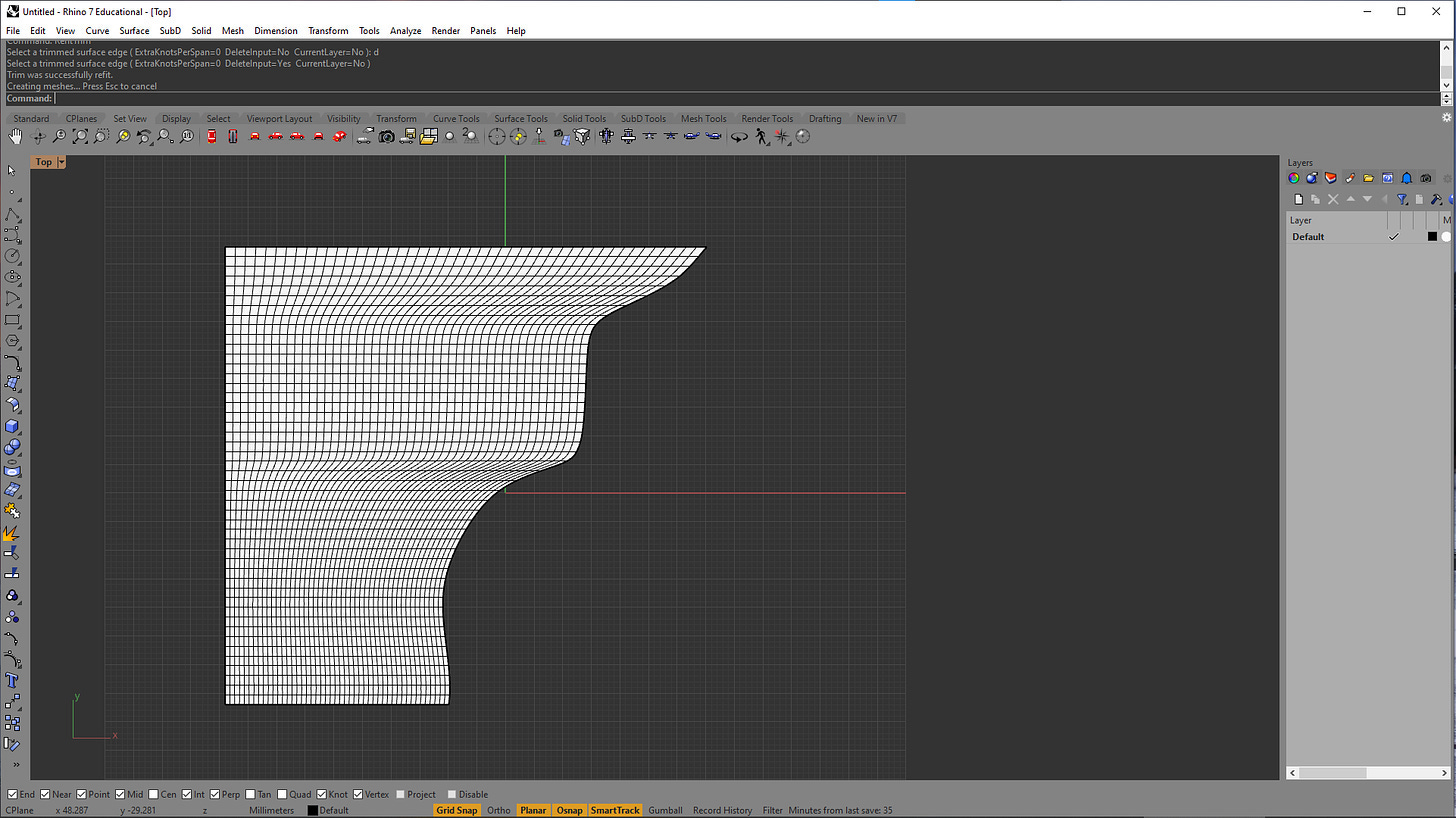
If you want the surface to actually match its visible shape, use the RefitTrim command. That rebuilds the surface with new control curves that fit the trim. It turns your trimmed surface into an untrimmed surface.
Why this matters
Because editing geometry is painful when you don’t know what you’re working with. Any of these methods all seemingly create the "same" surface but are very different when you try to edit them later.
Trimmed surfaces are great for performance and file size because they store less information. But if you need to modify the shape, you’re stuck with a curve that doesn’t match what you see as a surface. Untrimmed surfaces give you more control but at the cost of complexity and heavier geometry.
Knowing which type you have and the behavior of the surface creation methods can save you hours of grief, especially when something doesn’t behave the way you expect.
Surfaces are simple in theory. It's just two control curves. But the second you start modifying or trying to export them, it gets complicated really quickly. Rhino gives you a lot of ways to make surfaces, but not all of them are equally editable.
If you understand how a surface is built, you’ll understand why it breaks and more importantly, how to fix it.
Bonus: Try other commands
Rhino’s got plenty more surface commands, EdgeSrf, Patch, NetworkSrf, just to name a few. Some give you more control, some try to be too helpful. The only way to really know what they do is to use them.
If you’re starting out, stick to loft, sweep, and planarSrf because they are the staple methods in Rhino. Once you understand how each method creates surfaces, the rest will make more sense.
Thanks for reading. If you’ve enjoyed that, consider subscribing.
When you do, you’ll get a free guide on how to apply computational design to your own work