

The Winton Guest House Modelling Challenge
Try your hand at creating this building

Previously, I wrote about why learning with a real problem in front of you is different from any tutorial. But it’s not good enough for me to just say “go find your own problems to solve”. So, this is the first article in rectifying that.
It’s the start of me giving you a real problem to work with in case you don’t have your own.
Below is everything I had when I started modelling the Winton Guest House. Treat it as a brief. If it helps, think of it as an assignment. Go through the reference images, do some googling of your own and read the modelling approach I have taken.
Then, when you’re ready, start modelling it on your own.
Yes, I know that can be scary and it can be overwhelming but that’s part of the process and the learning. The struggle is how you earn to look at something and build a Grasshopper script from it.
Then, when you are truly stuck or maybe you’ve made your own solution, reference it to mine. In the coming weeks, I’ll be publishing a modelling guide that shows the script I made. It’s my answer to the brief.
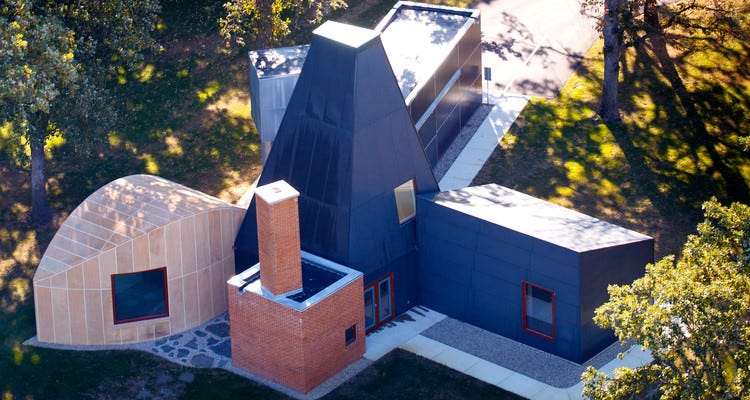
The Winton Guest House
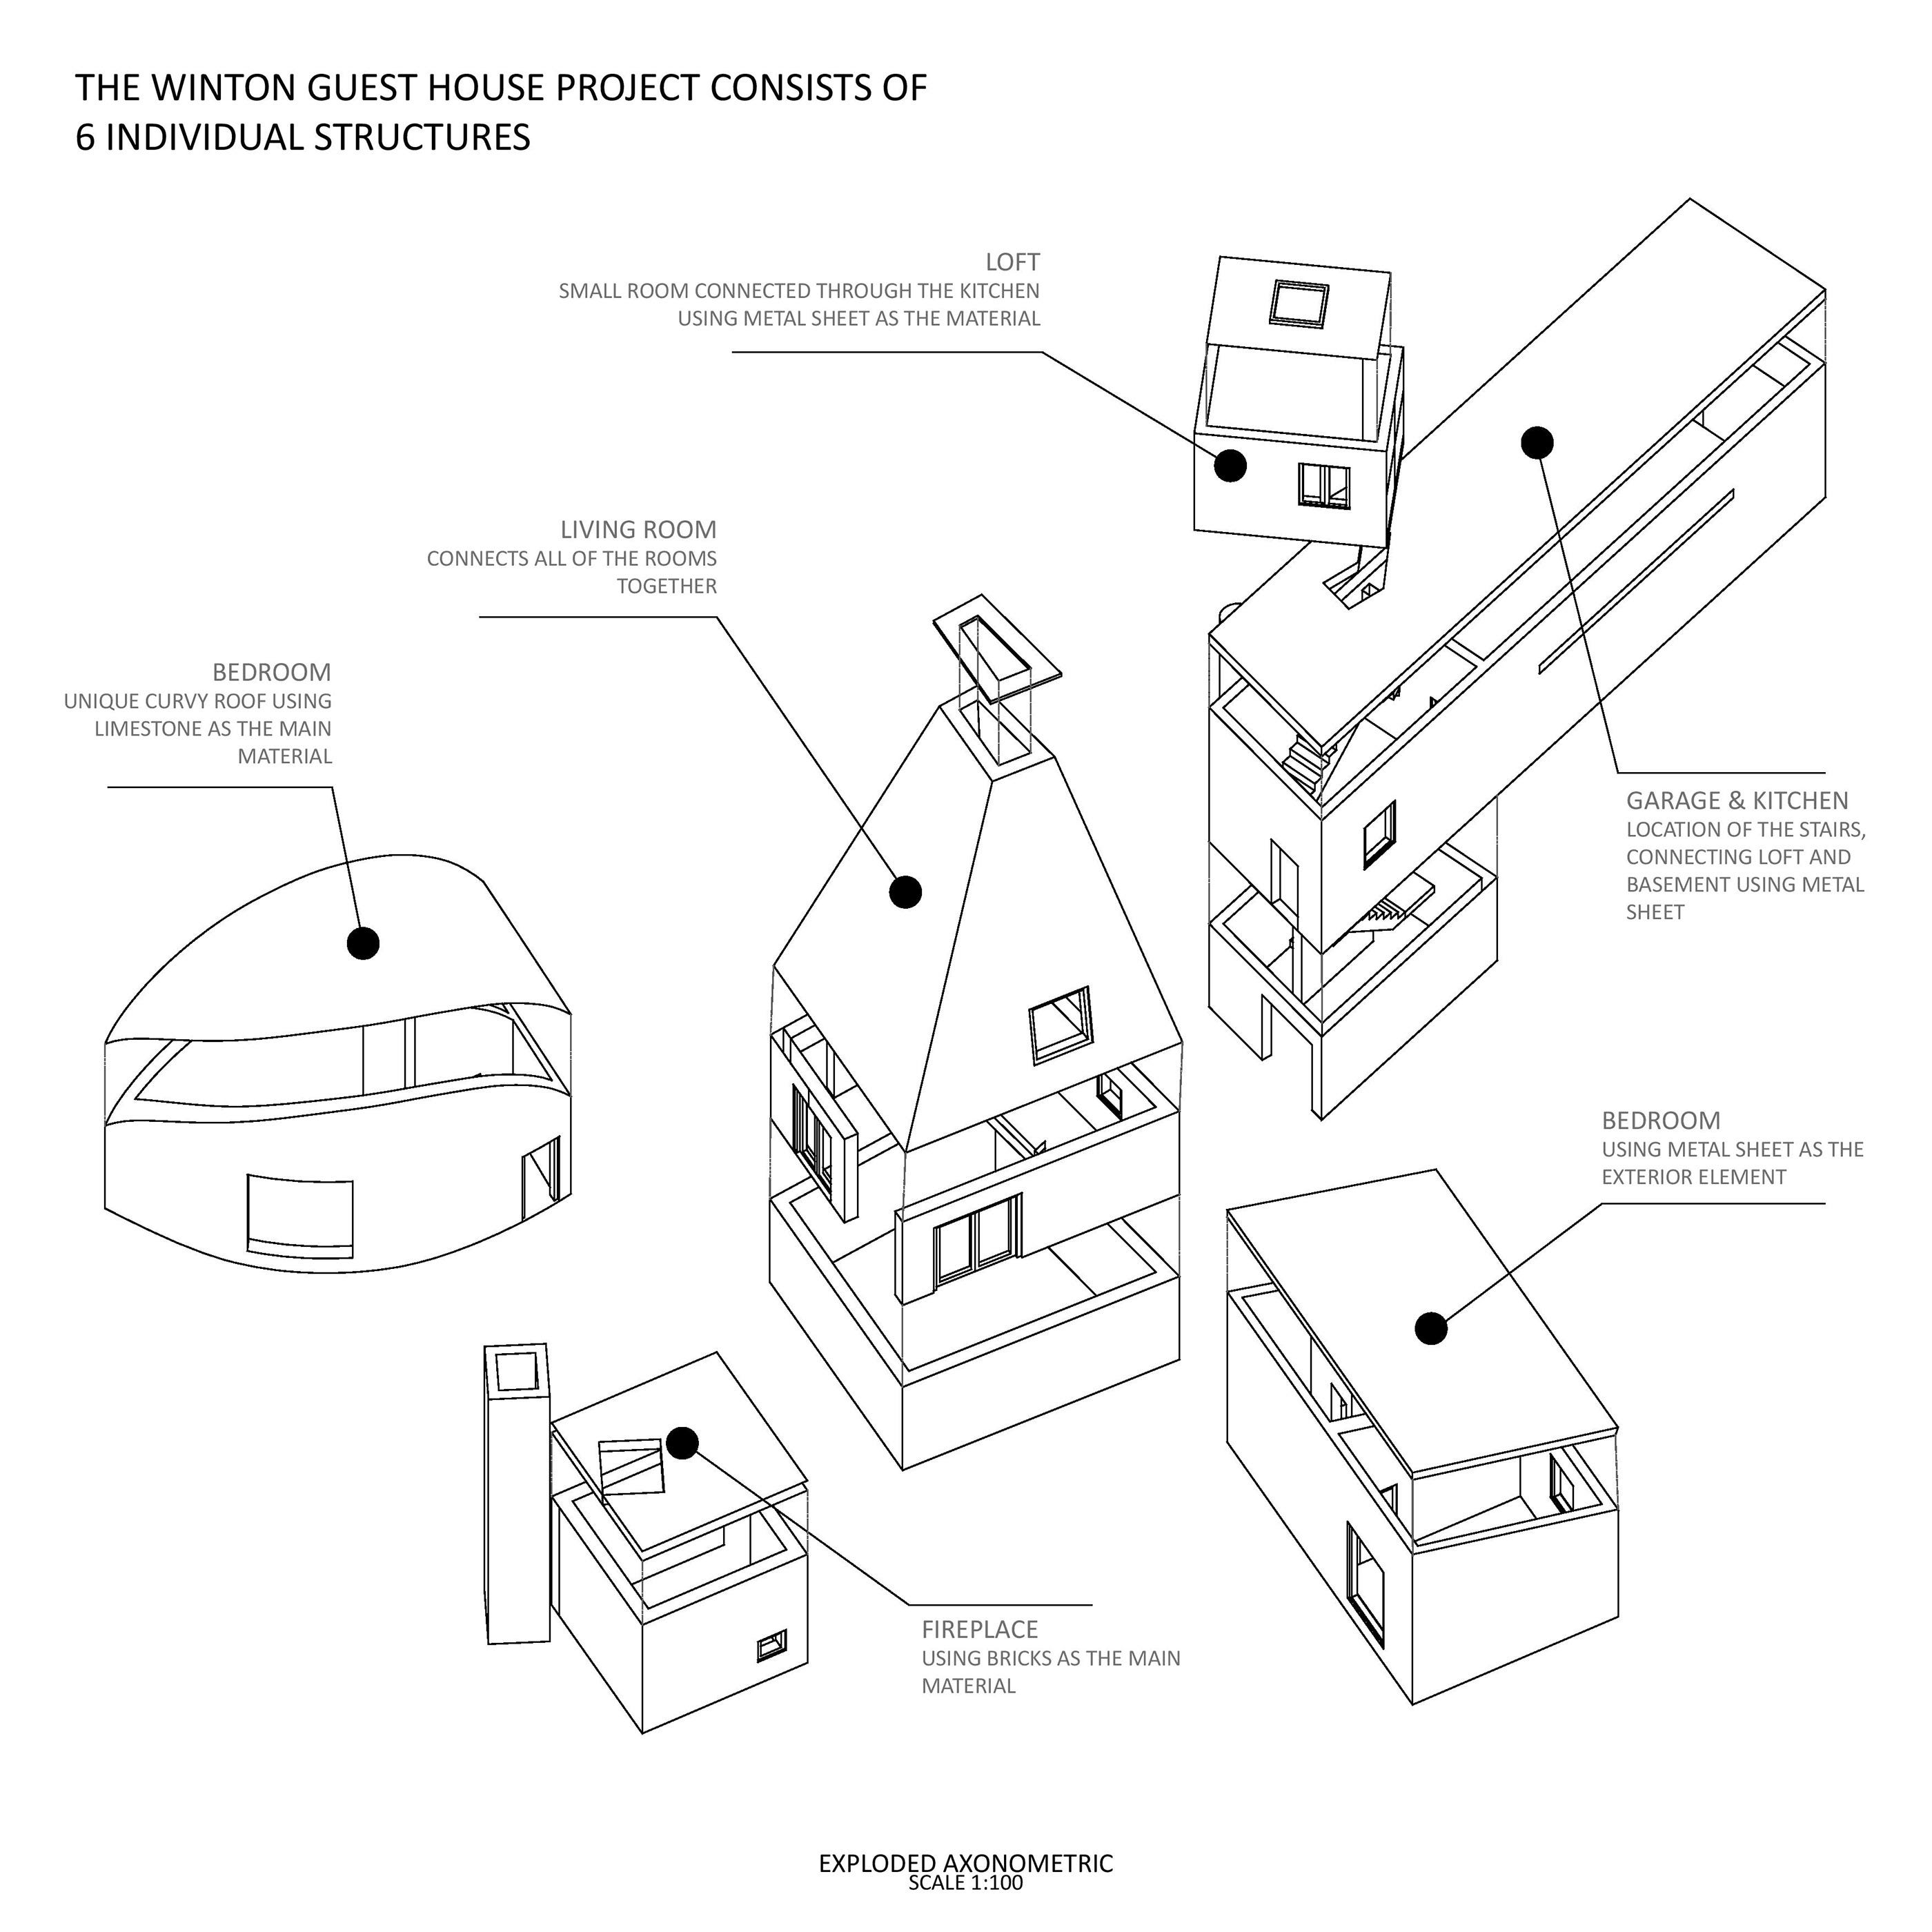
It consist of six distinct structures, each with its own type of geometry.
To make sure we are on the same page, here are the names and locations of each structure:
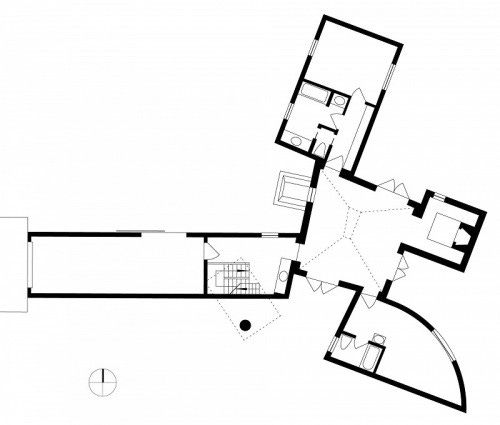
And the plan view, which, to me, is the most useful reference for setting out the geometry:
If you do need more information, you can always find them online.
My (recommended) approach
When I look at a building I have never modelled before, I am not thinking about the architecture. I am looking for the logic. Where does this start? What depends on what?
The Winton Guest House has a clear one to me.
The fireplace is the anchor. Everything else in the script works from it in some way. The chimney grows out of the fireplace. The living room grows out of the fireplace. The garage grows out of the living room. The loft sits alongside the garage. The second bedroom is the last piece to slot in.
Of course, if you do want to start from another building like the living room, please feel free to
Once you see that flow, the model becomes one problem with six big steps, each one using what came before it as its starting point. That order is why the guide starts with the fireplace rather than whichever structure looks most interesting.
The fireplace is really just a box with another taller box on top that makes the chimney. The roof of the living room is a trapezium and the rest are also combinations of simple shapes with the exception of the bedroom. So, leave that for last. And if you get really stuck on that, part 3 of my guide will show you how I did it.
Start now, don’t worry about perfection
You do not need to get everything right, and you do not need exact dimensions. Focus on the relationships between the structures rather than precise measurements. What we want from these modelling challenges is for you to build the instinct of creating your own workflow and pulling components to solve problems.
When you are ready to compare notes, or when you hit a wall, the modelling guide is split into four weekly parts:
Part 1: Fireplace, Living Room and Bedroom
Part 2: Garage and Loft
Part 3: Second Bedroom
Part 4: Script Organisation
Each part has a script file so you can check your work section by section. Part 1, starts next week.
But as you go through it, remember that my approach is just one way. There is no “ultimate“ way to model this. But we all have to start somewhere, so if your script differs from my guides, it’s okay. We’re just getting the reps in.
Happy scripting!
Thanks for reading
Subscribe to CodedShapes to get notified on when part 1 of the modelling guide is published